
 |
|
|||||||
| Register | FAQ | Donate | Members List | Calendar | Arcade | Casino | vBGarage | Search | Today's Posts | Mark Forums Read |
 |
|
|
Thread Tools | Display Modes |
|
|
#1 |
|
S5, Sport On, DSC M-track
Join Date: Jun 2008
Location: Auckland, New Zealand
Posts: 1,434
Casino cash: $13579  |
Some maybe aware, but the CSL front bumper wiring loom is NLA
So I've decided to look into how easy it is to turn the stock E46 M3 wiring into a CSL one. Turns out pretty bloody easy, so I've decided to make a DIY in case anyone needs to fashion one up in the future. The reason you'd want to do this is because the CSL wiring lacks the fog light plugs and also the horn plugs are on the right hand side not left hand side like the stock M3. BMW uses Raychem branded heat shrink and specifically the inner resin coated type - I've used the exact same type except in black for my wiring DIY. First find yourself an E46 M3 bumper wiring. As you will see it has two fog light plugs in grey and the horn plugs are on the left side (near the main round plug). Steps: 1. Cut horn plugs 2. Cut fog light plug on left side (terminate the wiring for this +ve wire) 3. Terminate all cut wires 4. Join the yellow +ve wire from the right hand side fog light plug to the purple +ve for the horn on the left hand side 5. Cut the fog light plug on the right side 6. Connect the horn wires together and crimp onto existing right side fog light wiring. 7. Tidy up wiring and admire your work  So you start off with this 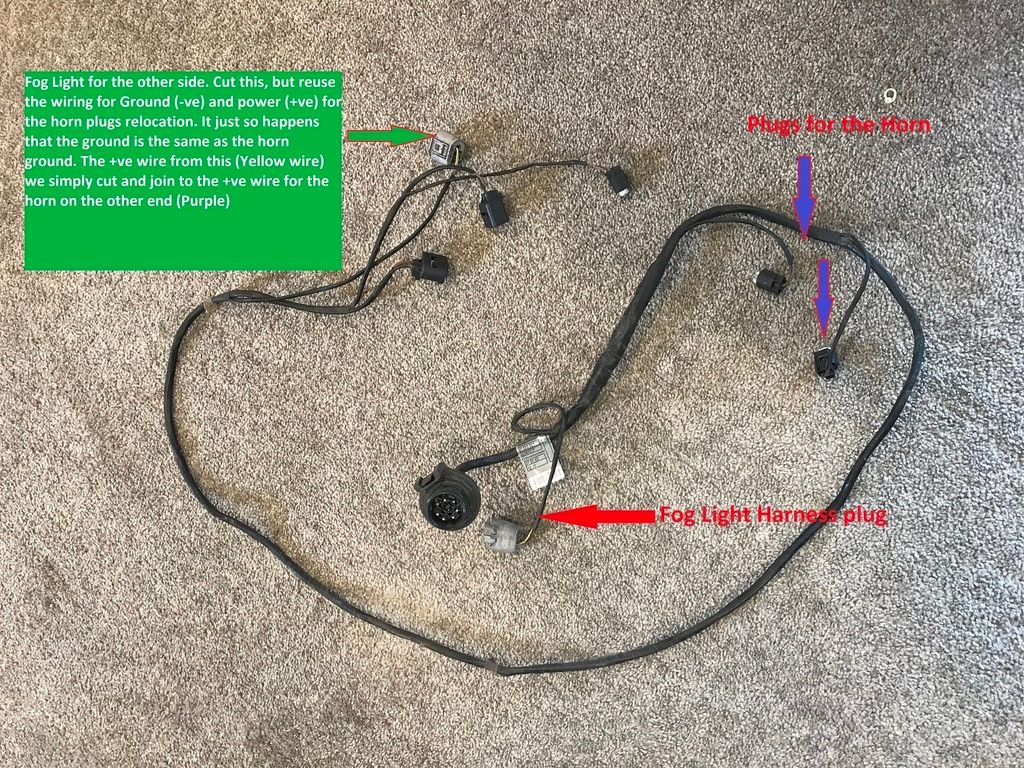 insulation removed 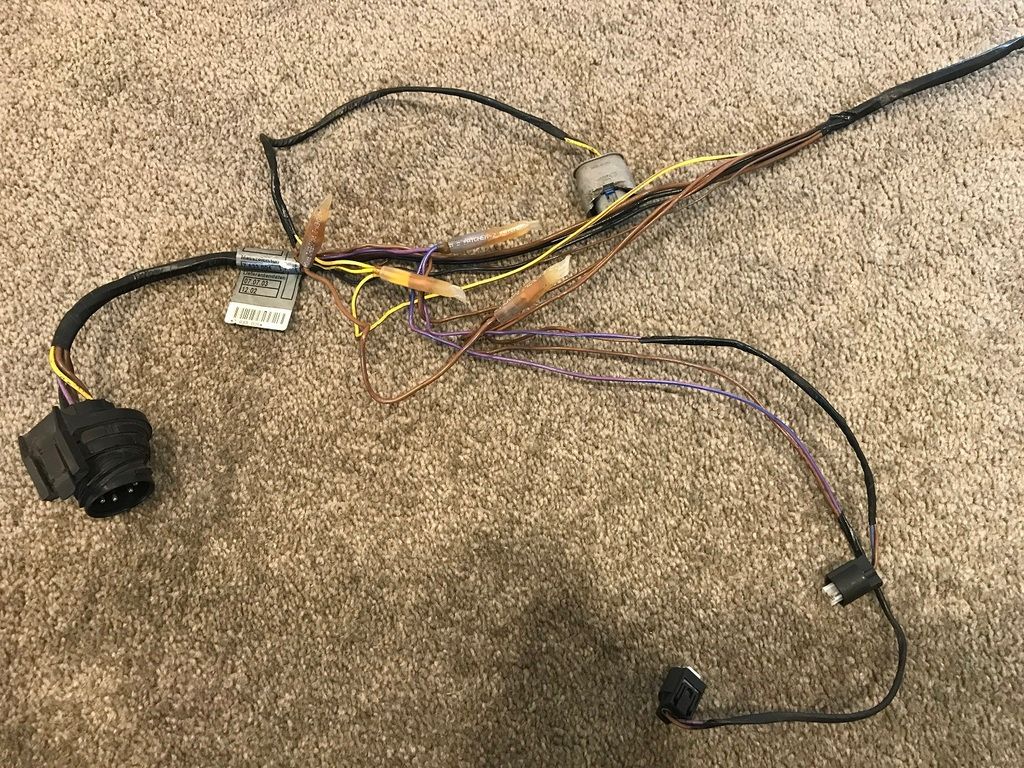 left side fog light plus wiring and horn wiring up close 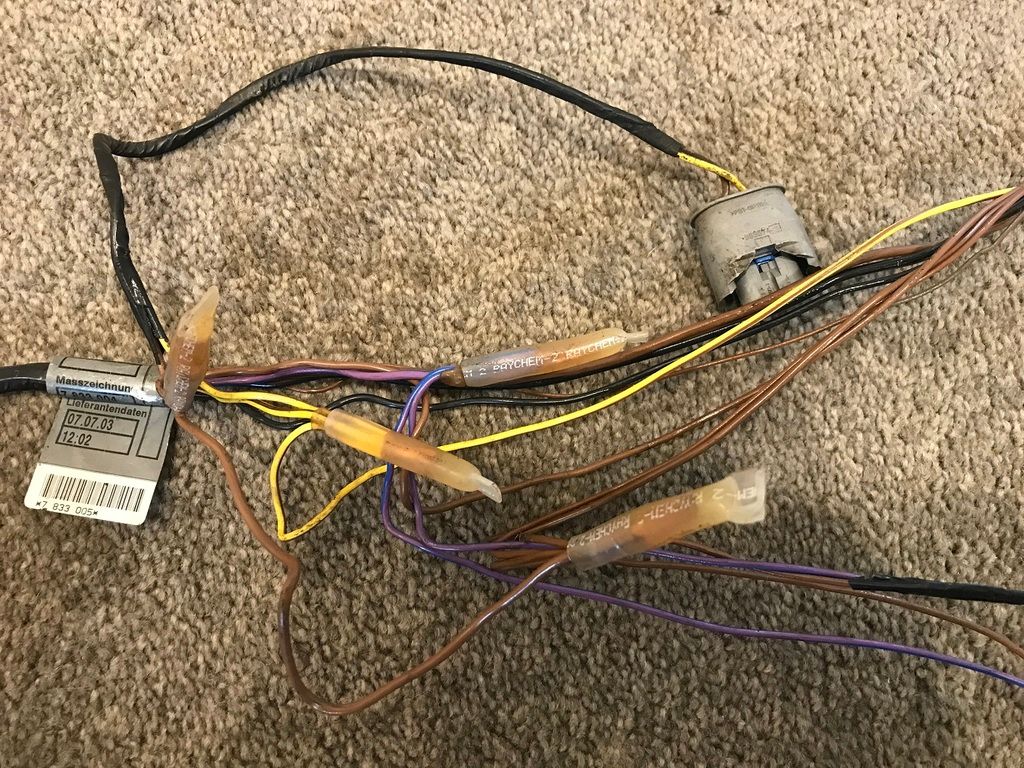 Chopping time (first the horn) 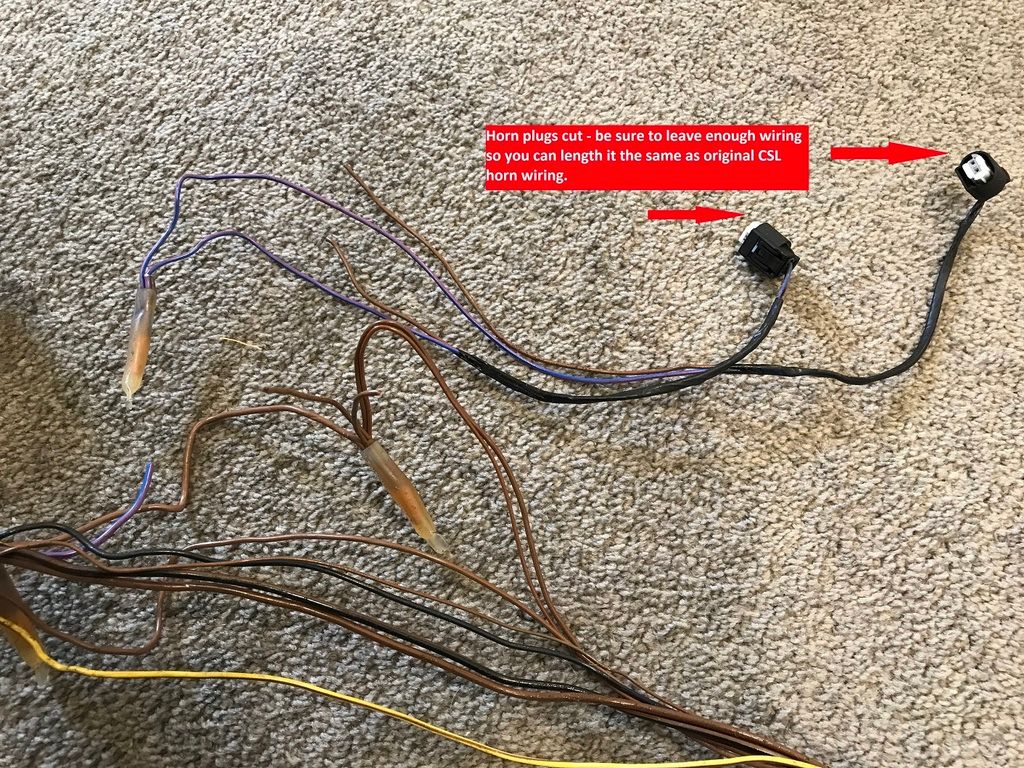 then the left side fog light plug 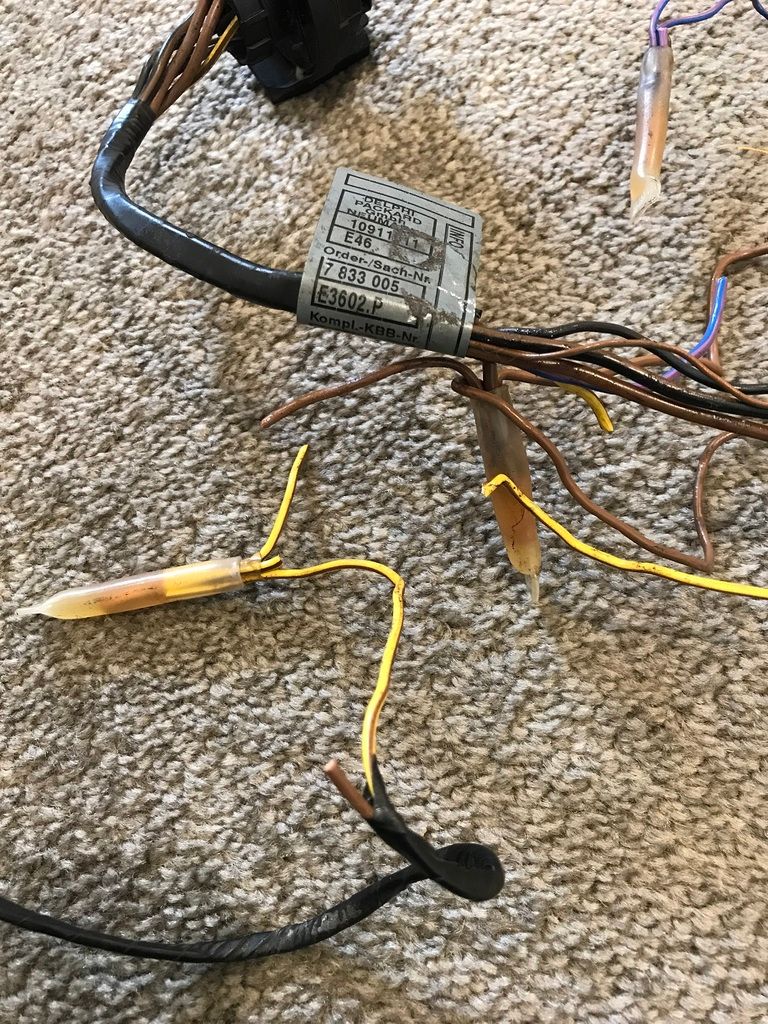 Terminate the ends  Join the cut yellow wire which feeds the right side Fog light +ve and join it to the horn plug +ve (purple wire) on the left side (I used crimping, but forgot to take a photo - crimp is the recommended wire repair method by BMW) 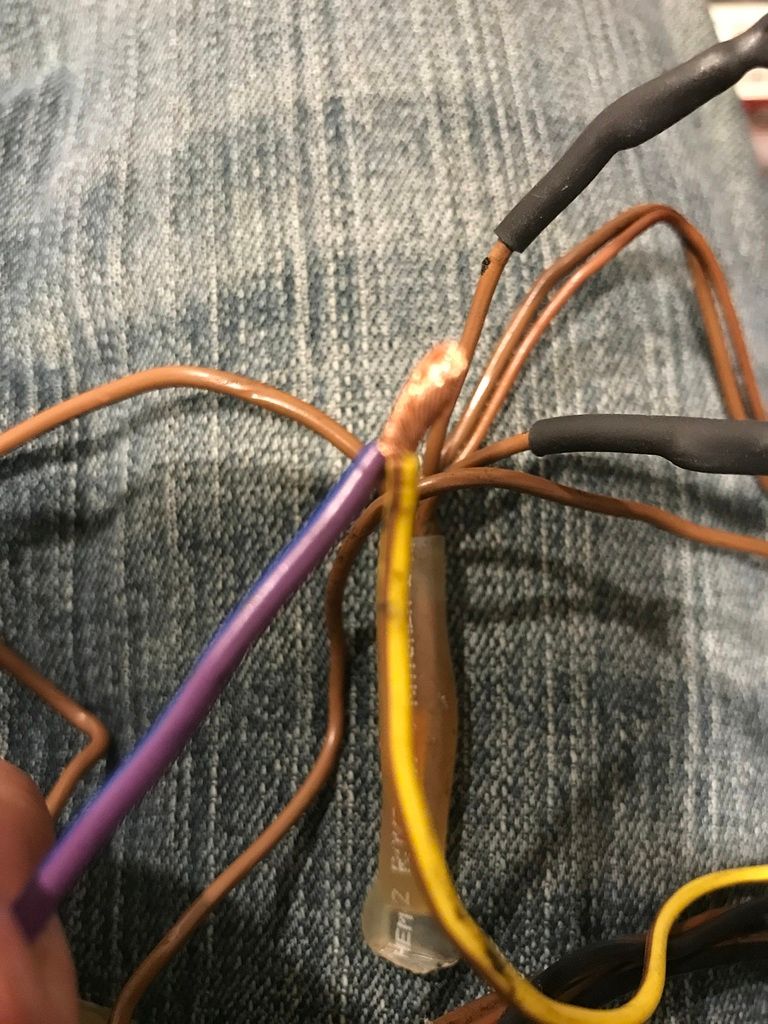 Left side done 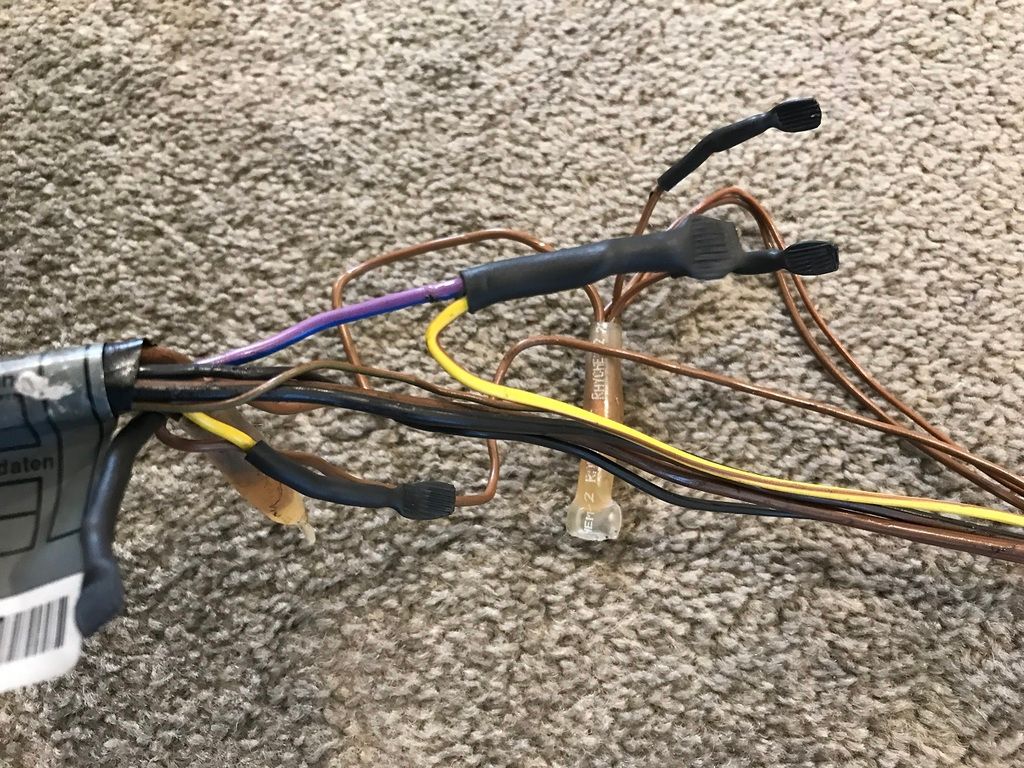 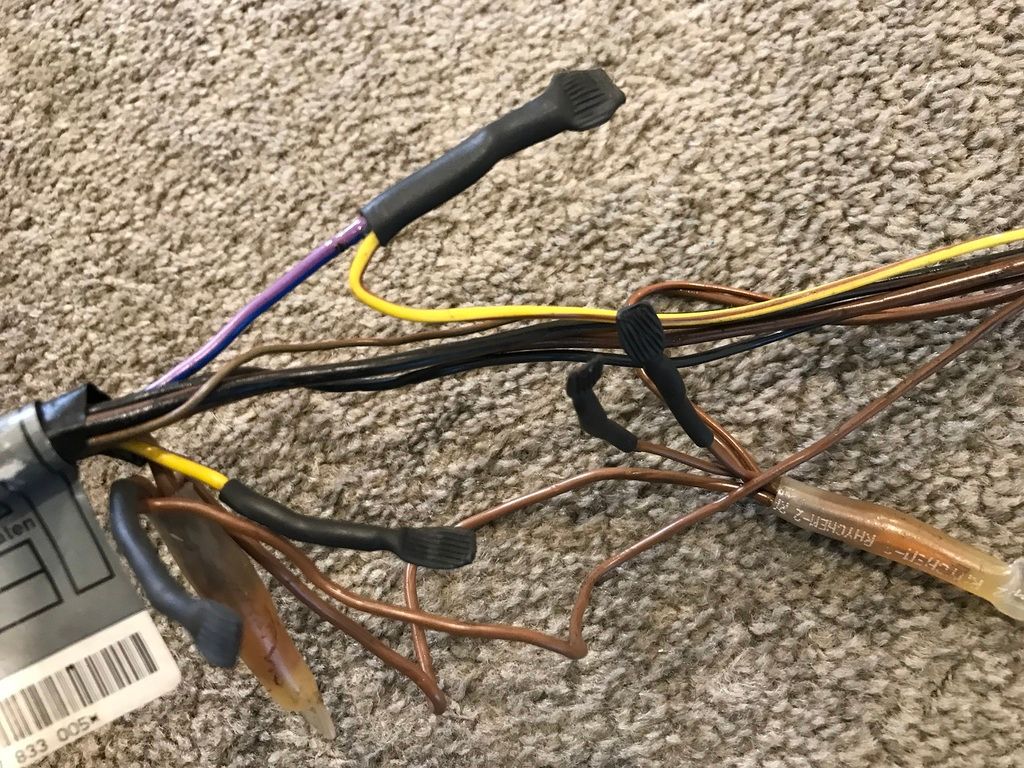 join the horn plugs like so  Chop the right side fog light plug and join to horn Crimping  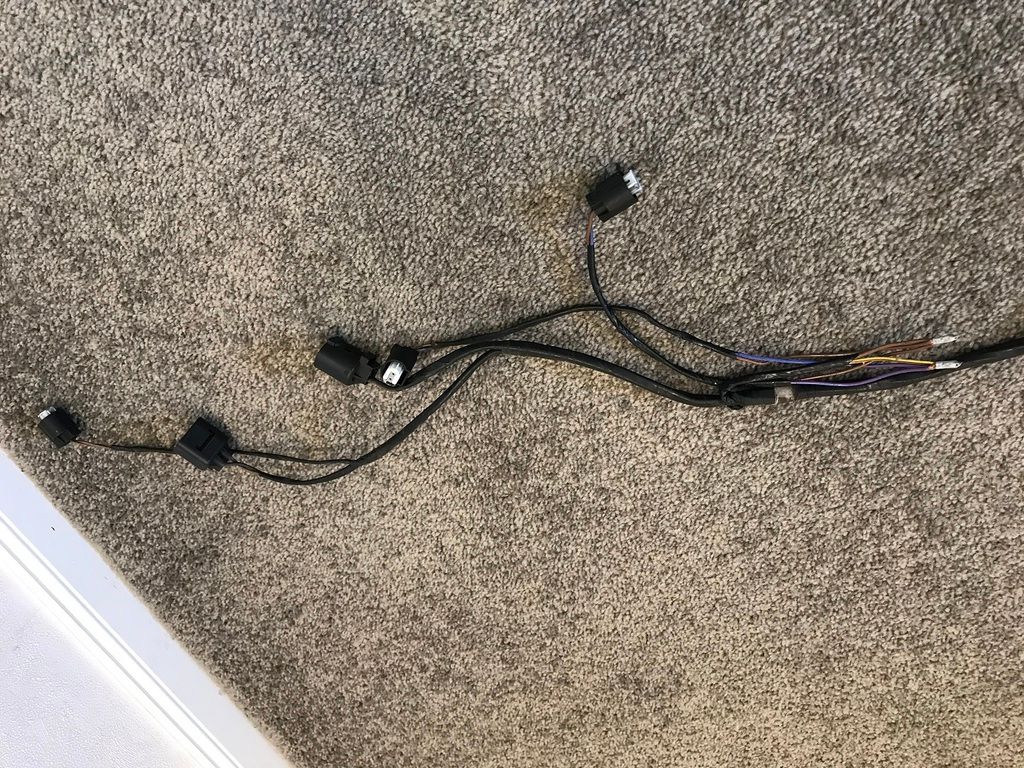 Sealing 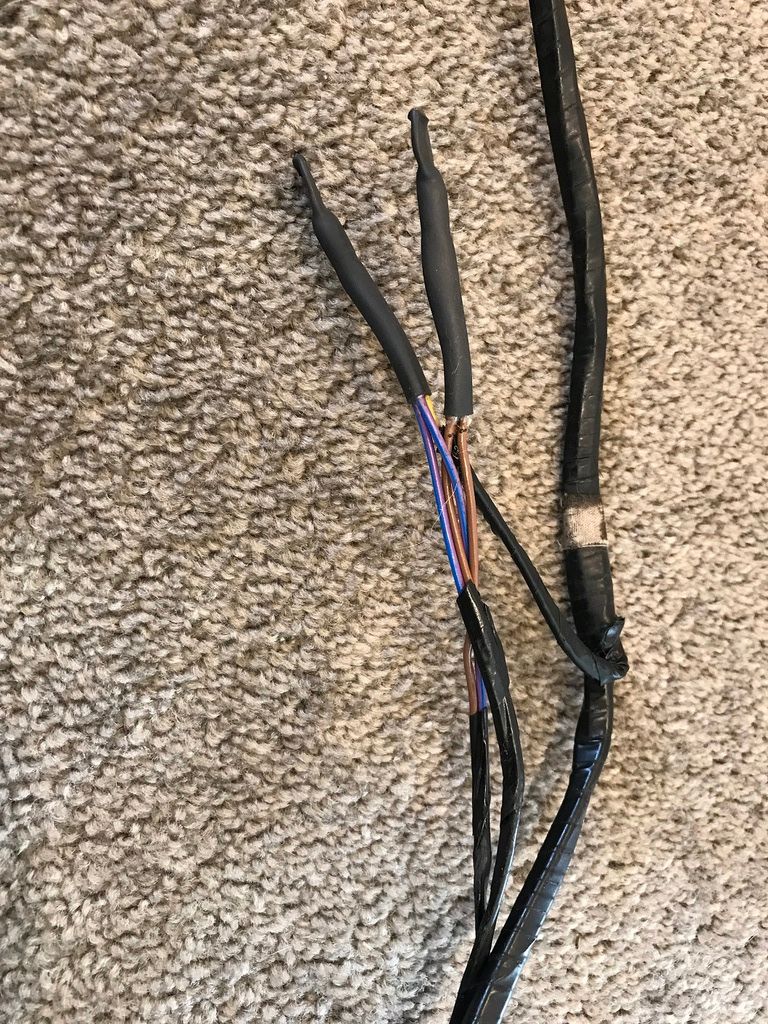 Right side done 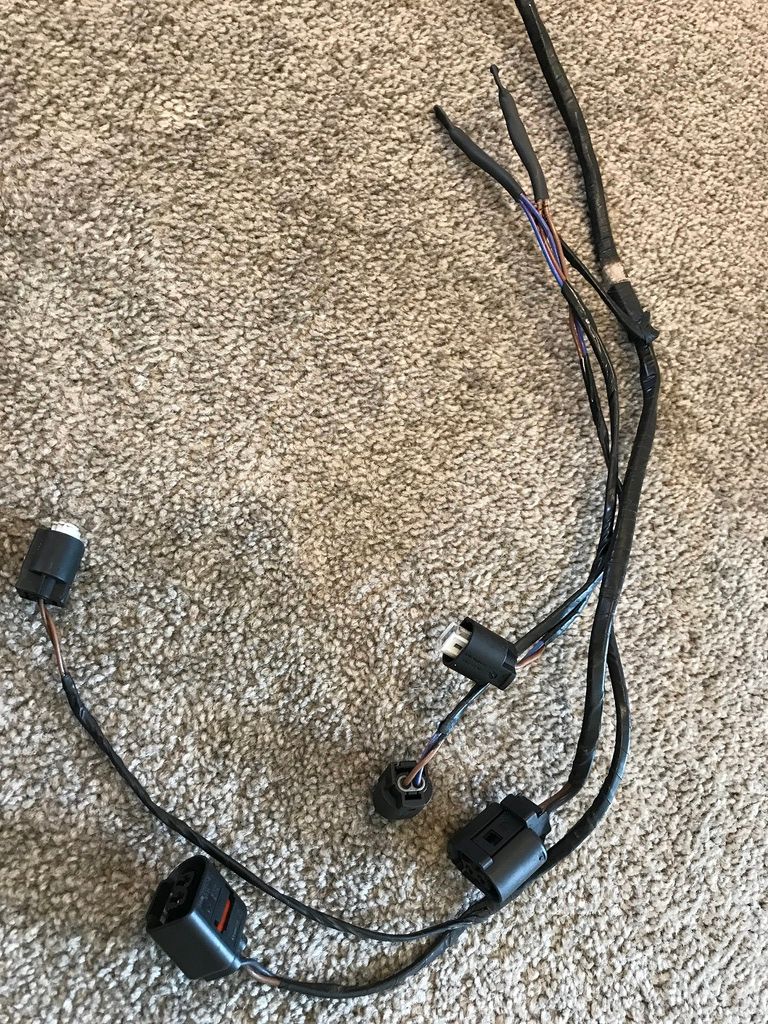 Before insulation tape goes on  Insulated and compared to a Genuine CSL bumper harness (on the left) 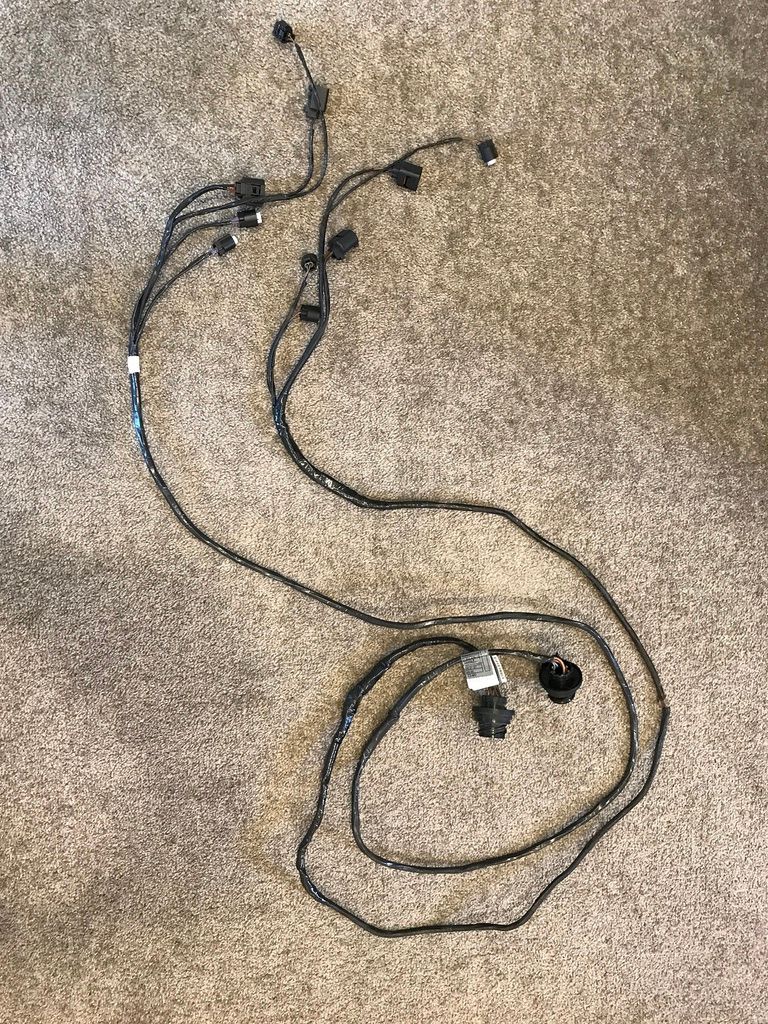 Up close (Genuine CSL on the left) 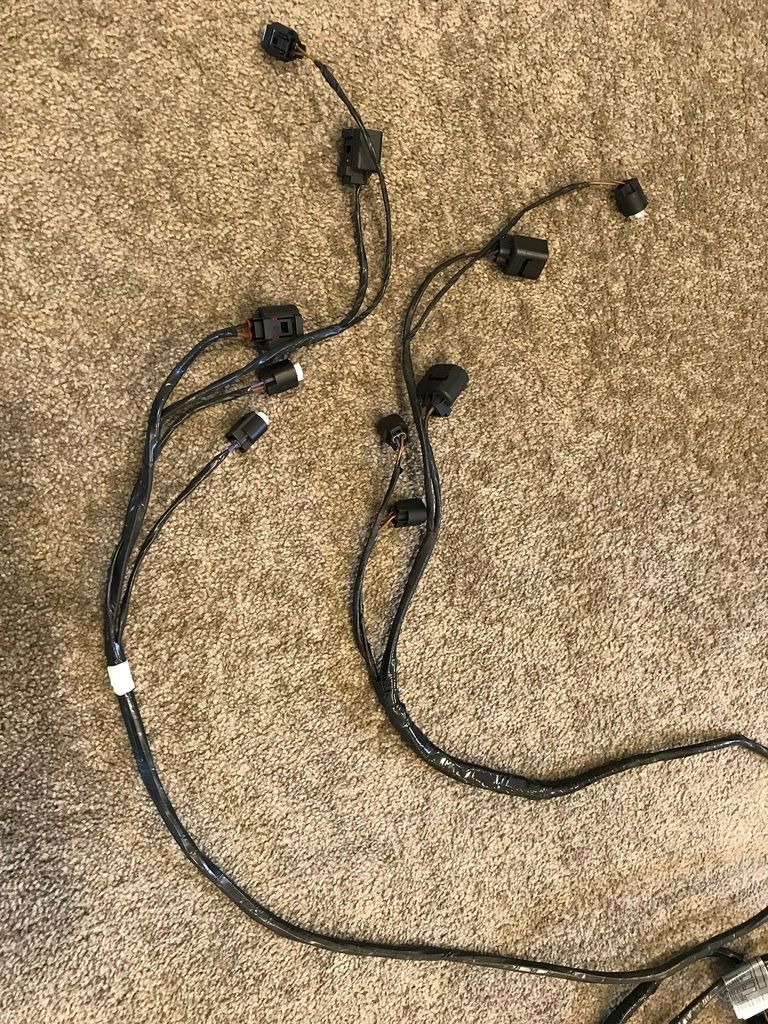 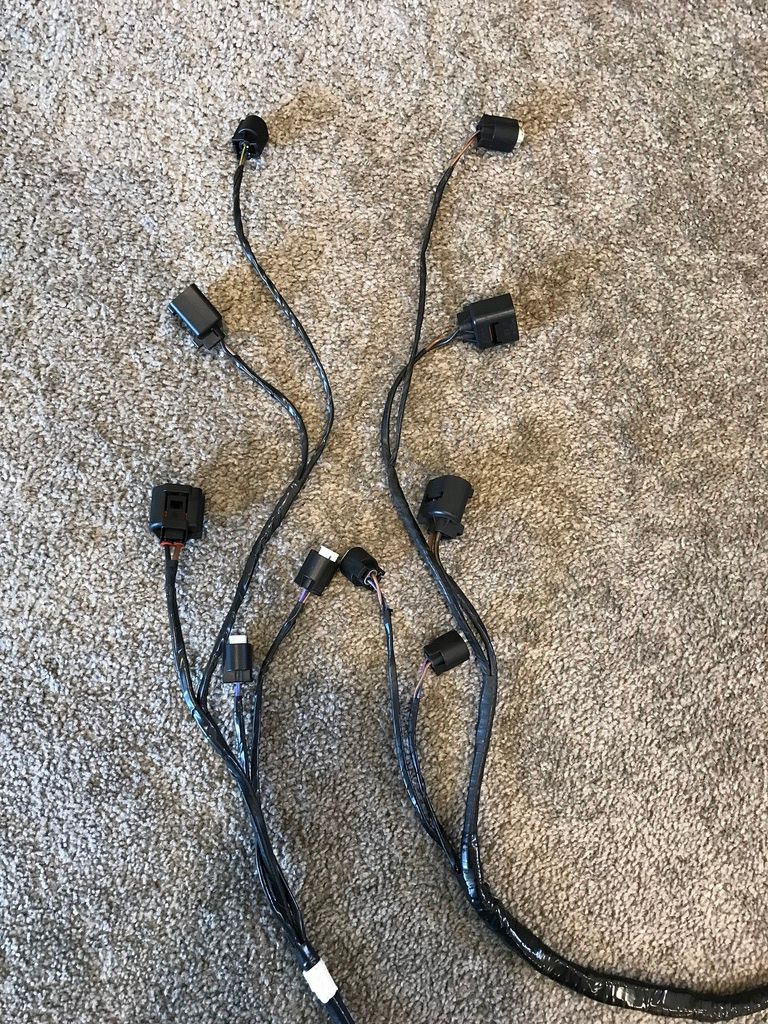
Last edited by NZ_M3; 15-03-2019 at 05:13 AM. |
|
|

|
|
|
#2 |
|
S5 - Full Throttle
Join Date: Oct 2014
Location: Germany
Posts: 475
Casino cash: $6813  |
Nice writeup, thanks for your efforts.
Might come in handy some day.. which i hope not, of course 
__________________
Greetings, Julian. 
|
|
|

|
|
|
#3 |
|
S5 - Full Throttle
|
Nice DIY.Thanks for posting this.
__________________
EURO 04 M3 Current Mods: GC Coilovers, Eibach Sways, RE RCA?s, VCSL Bumper, OE CSL Boot, VCSL CF Rear Diffusor, DIETZ TV in Motion, SS Stepped Headers and catless, SS Res X Pipe, SS Race exhaust, OEM CSL Steering + interior, OEM CSL Intake, MSS54HP with HTE Tune, BBS CH's/LM?s FX-R Projectors + night breakers, STOPTECH ST60/40, RE Front strut brace, DINAN Rear Strut Brace, |
|
|

|
|
|
#4 |
|
Wonky 'L' after Washing
Join Date: Sep 2017
Posts: 6
Casino cash: $3769  |
Good timing as it's just about time for me to install the OEM CSL bumper and I was wondering how to tell the shop to lengthen the horn wires.
|
|
|

|
|
|
#5 | |
|
CSL Register Uber-poster!
  Join Date: Apr 2008
Location: Uk
Posts: 14,646
Casino cash: $43909  |
Quote:

__________________
. |
|
|
|

|
 |
| Thread Tools | |
| Display Modes | |
|
|