 24-03-2010, 02:53 AM
|
#1 |
|
S5 - Full Throttle

Join Date: Jun 2009
Location: Guisborough
Posts: 453
Casino cash: $4472  |
I decided in late 2009 that I was going to go ahead and build a track car after many years of talking about it, but never actually doing it. At first I was going to use my daily driver at the time; an EP3 Civic Type-R, however I really wasn’t convinced by it, as all I have ever really drove on track is RWD cars. As good as the Civic was, and don’t get me wrong out the box they are an awesome car, I just could never warm to the fact it was FWD and hankered for another BMW after my short lived ownership of an M3 CSL.
So in October 2009 I started looking into what to choose, the obvious been an e36 M3 but a little more research brought up another contender, an e36 328i Sport. Not only was insurance one third of the cost, the Sports are a lot lighter at the front end which on tighter tracks meant less under steer, sure it’d be 100bhp down but I was convinced it’d be a good base car to start with. Roll on December and I’d found a 328i Sport I really like the look of, however it wasn’t for sale I’d just seen the pictures on a forum that both myself and the owner are members of. I decided to ask the owner, Jon, a few questions... just about what he thought of the car, and if he had to do it again would he buy another. Anyway, one thing lead to another and it turned out due to driving excessive miles that Jon was considering selling the car for a more eco-friendly option. I jumped at the chance and agreed to come and view the car, snow however put a stop to that for a few weeks but by mid-January I was the proud owners of a Hellrot Red 328i Sport which had covered a mere 167,000 miles!!! Yes that’s right 167,000 miles but don’t let that put you off, apart from a few stone chips and a small bit of rust on the front drivers side wing (which has since got worse due to salt!) this car was by far the best conditioned example I have ever viewed and came with EVERY single receipt for parts/work carried out dating back to when the car was first registered in August 1998. Here are some pictures of the car after I got it home and gave it a quick clean; 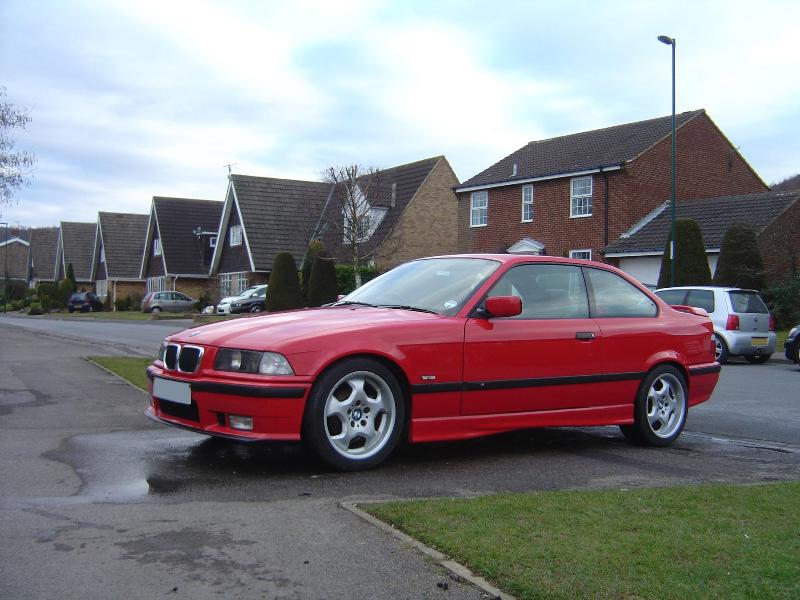 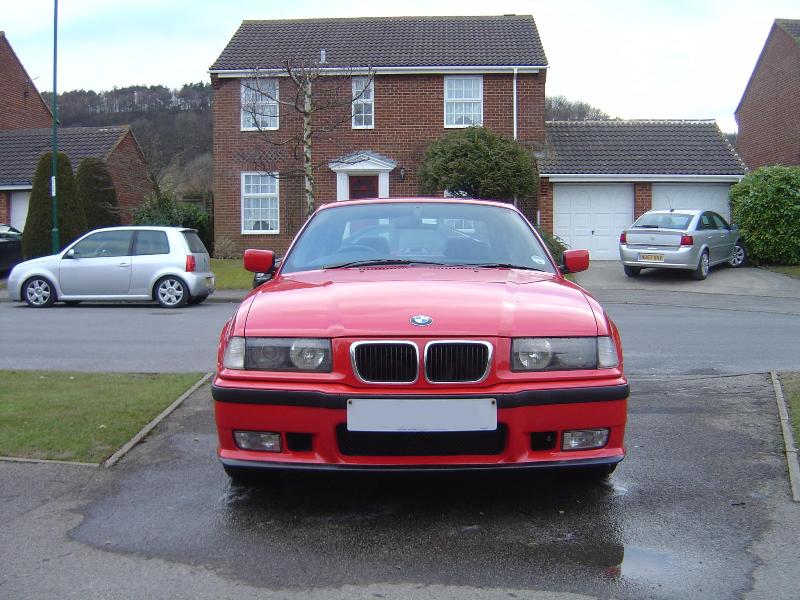 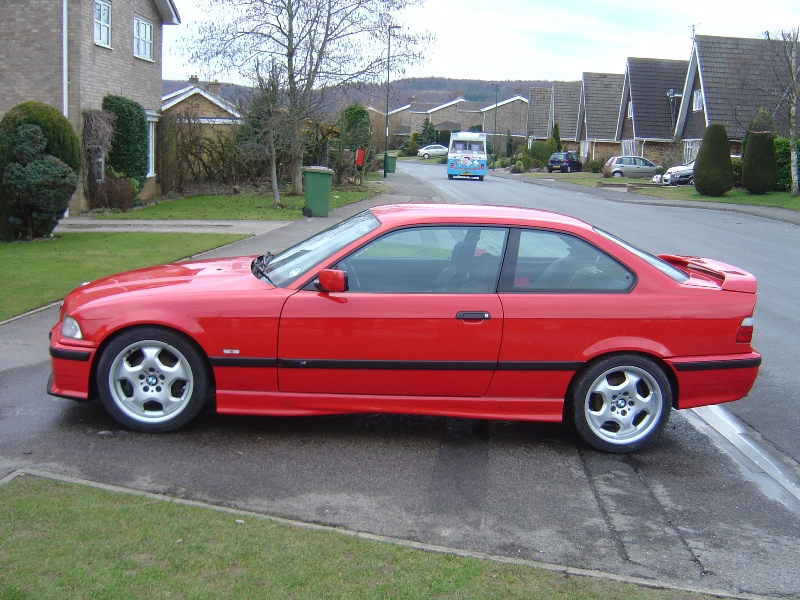 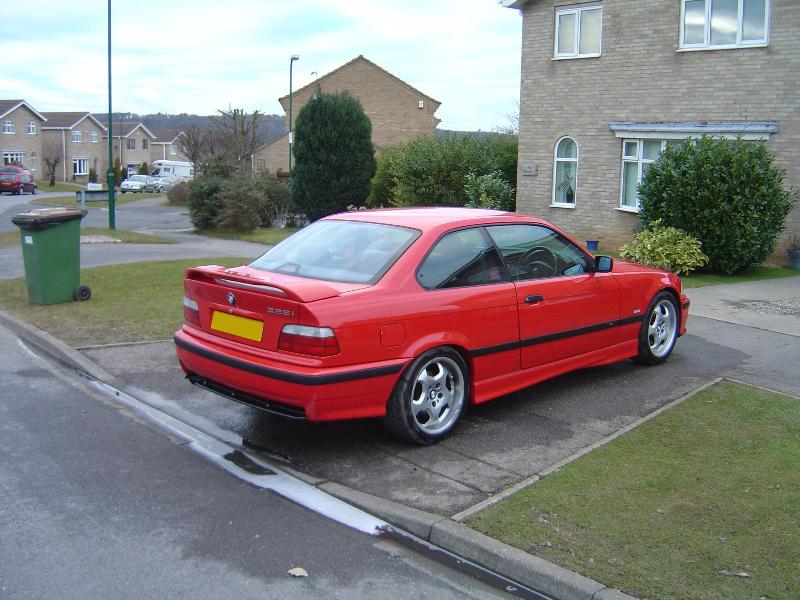 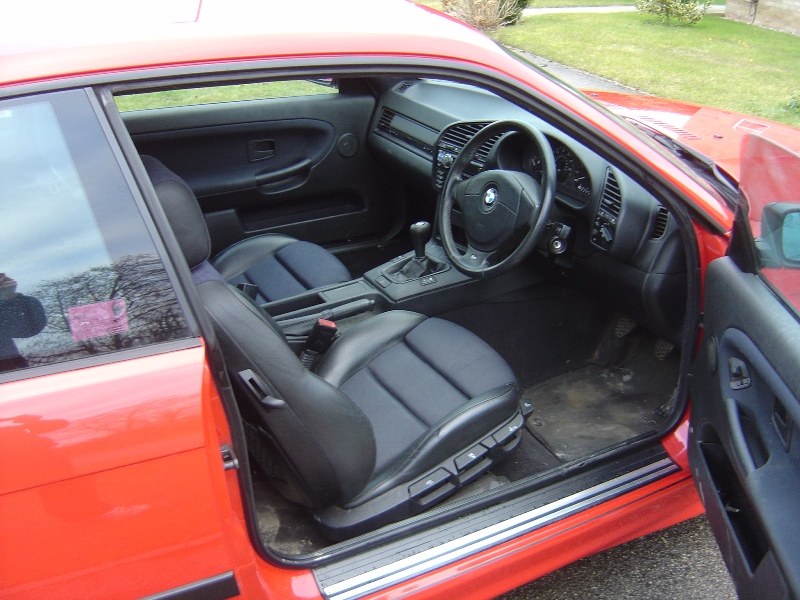 The car came with both the current winter wheels; M3 Saloon Contour II’s plus a set of standard BBS RC042 wheels in need of a bit of refurbishment, mainly due to water getting under the lacquer. For the first few weeks of ownership I was debating whether to actually spend money on the car, or just leave it as an un-abused example, I had even sold my Type-R and given the 328i Sport ‘daily driver’ status. In February, a few friends and I decided it would be a good idea to kick the track day season into action and booked up to go to Oulton Park on the 24th. The journey down was wet and miserable but our spirits were not dampened, we got there signed on and went out on a very wet and slippery track. But something rare happened, for the first time of 2010 the sun actually shined and by the afternoon the track was dry and I started to enjoy the car a lot more, this was bad news for my bank balance as I had now decided to bite the bullet and get cracking on re-freshing a 12 year old car to make it a bit more track friendly. Lots of plans run through my head, and also so did many £ signs. But I decided to start work on planning the chassis, brakes and running gear, leaving the engine and interior for the time being. Due to the car been a later car it had the good alusil engine without the nikasil worries, however it was lacking a limited slip differential a small price to pay I guess for peace of mind. I decided at first just to keep everything 328i and just fit a 3.0 M3 diff and swap the input flanges over so I could use the standard 328i prop shaft and fit some quality discs and pads to the standard callipers. The plans were to keep everything to a budget, hence the name ‘Project Credit Crunch’ but I decided to go a bit further, still sticking to the plans of a budget track build, however getting it right first time, instead of spending money on parts that would later be replaced by superior parts. By March the list of work to do was as follows; replace all bushes, upgrade the brakes, upgrade the suspension, fit a limited slip diff and a X-brace off a convertible. So the spending begun.... The parts started rolling in, and the final list of parts to be fitted before my next track day on the 19th of April at the Nurburgring was as follows; - Eibach Pro-Street S Coilovers - Camber Adjustable Top Mounts - Rogue Engineering Rear Top Mounts - M3 Convertible Front X-Brace - M3 Evolution Front Wishbones - M3 Evolution Front Hubs / King Pins - M3 Evolution Front Brake Set-Up - M3 Evolution Rear Trailing Arms - M3 Evolution Rear Brake Set-Up - M3 Evolution Rear Diff Carrier w/ 3.23 Limited Slip - M3 Evolution Rear Drive Shafts - M3 Evolution Brake Servo + Master Cylinder - Powerflex Black Rear Trailing Arm Bushes - Powerflex Rear Subframe Bushes - Powerflex Concentric Front Wishbone Bushes - Powerflex 25mm Front Anti-Roll Bar Bushes - Powerflex 19mm Rear Anti-Roll Bar Bushes - HEL Braided Clutch Line - Goodridge Braided Brake Lines - Z3M Short Shifter - Replacement Gear Selector Bushes - Replacement Bolts for Rear Trailing Arms - Replacement Exhaust Bolts + Studs - Redline ATF Gearbox Oil - Castrol SAF-XJ Differential Oil - Mobil Engine Oil - Silkolene DOT4 Brake Fluid So I had a lot of work ahead of me, with a short amount of time to do it all. In fact I only had 5 days off work in between ordering the parts and the track day so it was going to be tight, remember this car is my daily driver too!!! As I waited for the part’s to arrive I decided to give the underside of the car a little clean, as I really didn’t want to be laid under a car with dirt dropping into my eyes every 5 seconds, and I only had a 3 day window to fit most the above parts so I wanted to asses everything thoroughly first. 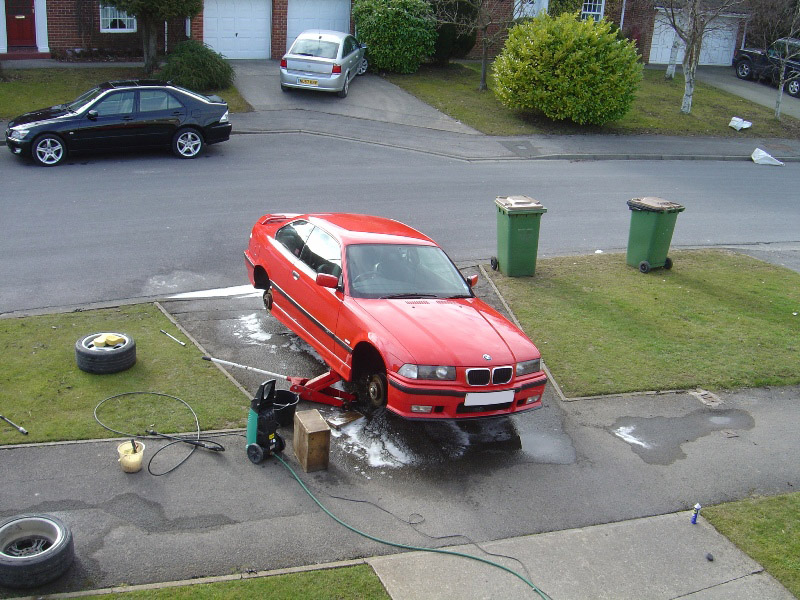 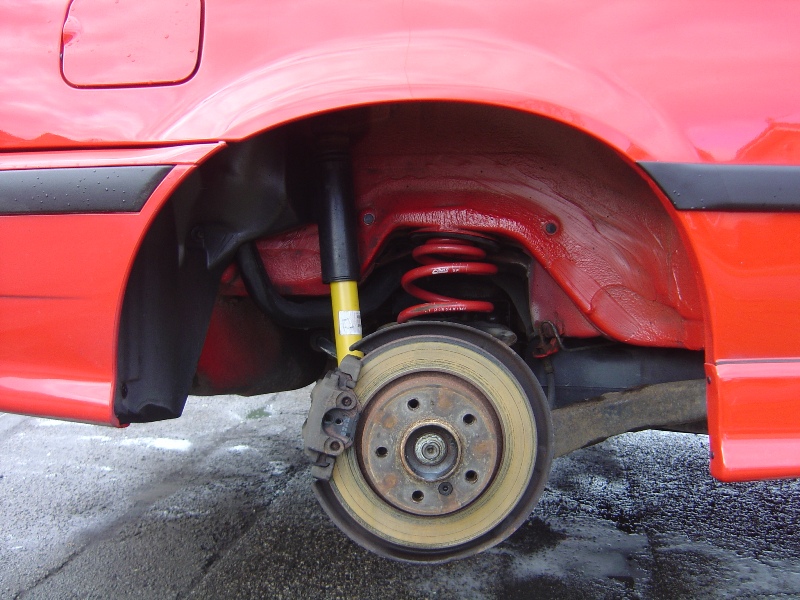 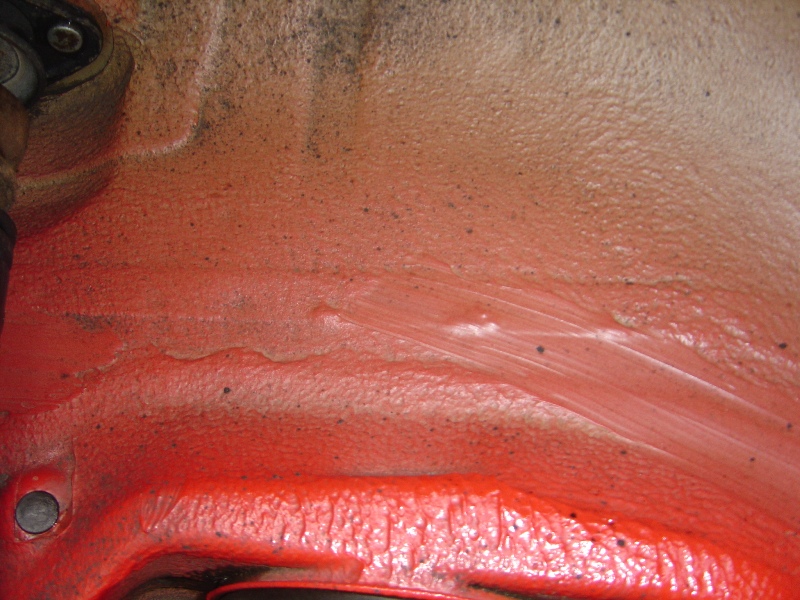 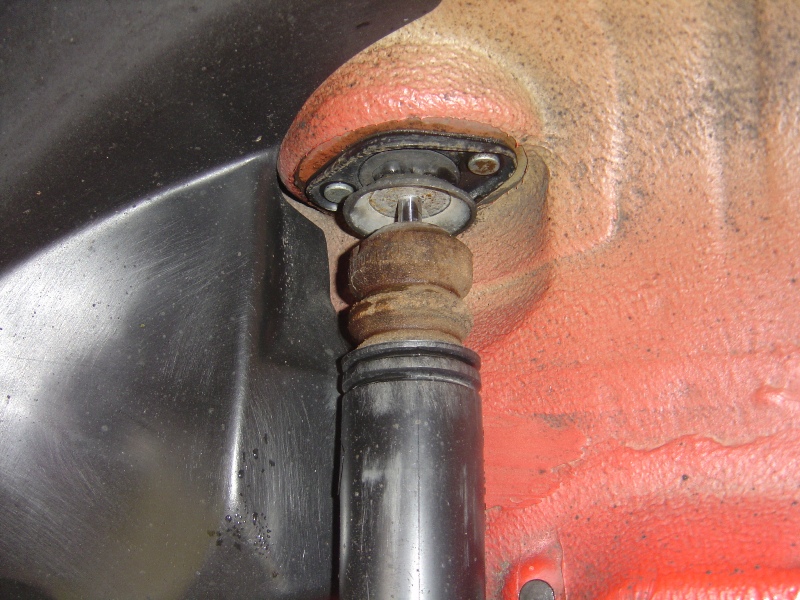 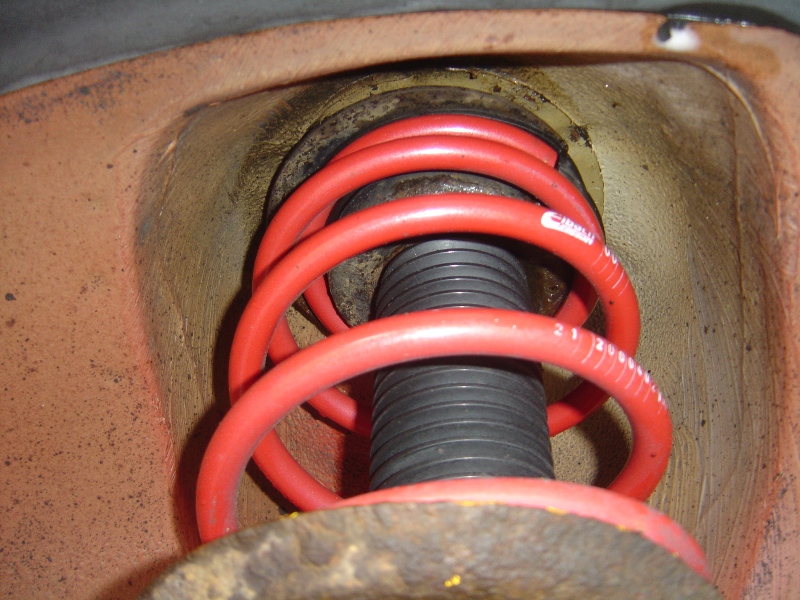 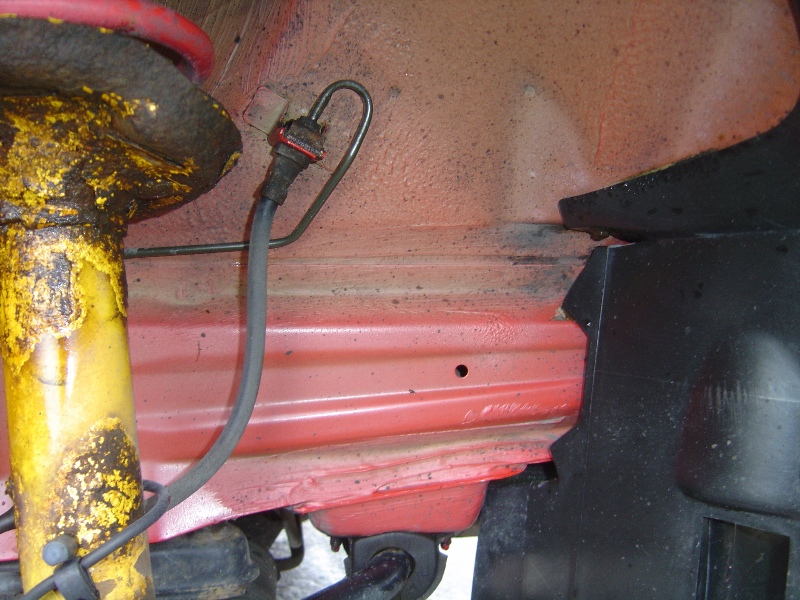 As well as cleaning I decided to free off all the old bolts and copper grease them to speed up the dismantling process, I also decided to remove and temporarily replace the heavily corroded exhaust bolts as this would save time in the long run and keep my stress levels low on the day of fitting the new back axel. 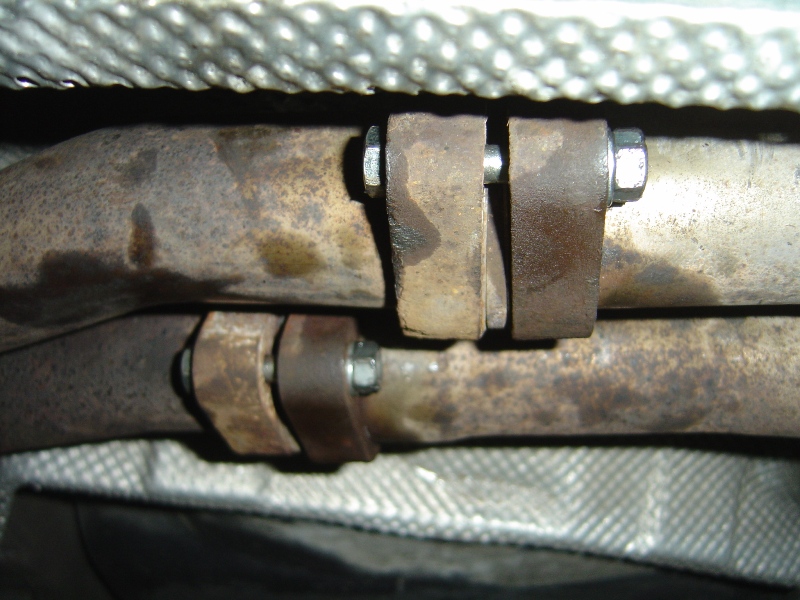 Now the first parts stared arriving at the door, most were useless without other parts accompanying them however the BMW X-Brace wasn’t and I decided to fit this straight away. Fitment was simple, you need to make some bolts up that will help compress the riv-nuts but other than that it was straight forward. 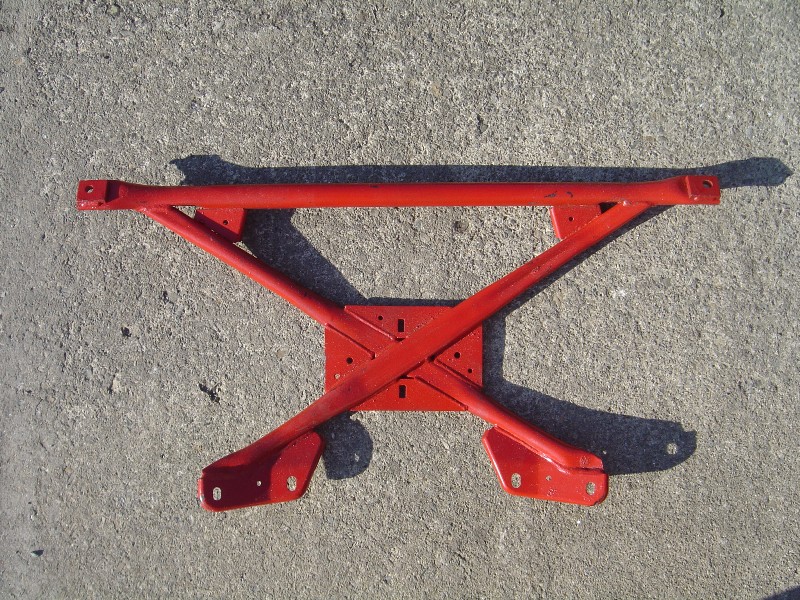 The bolts that compress the riv-nuts, be careful when doing this you need to apply some lock tight to the riv-nut to stop it turning, thus allowing it to compress. All went fine until the 4th nut, the lock tight had hardened so much that when removing the bolt it sheared and we had to carefully drill it out without causing any damaged to the riv-nut threads. 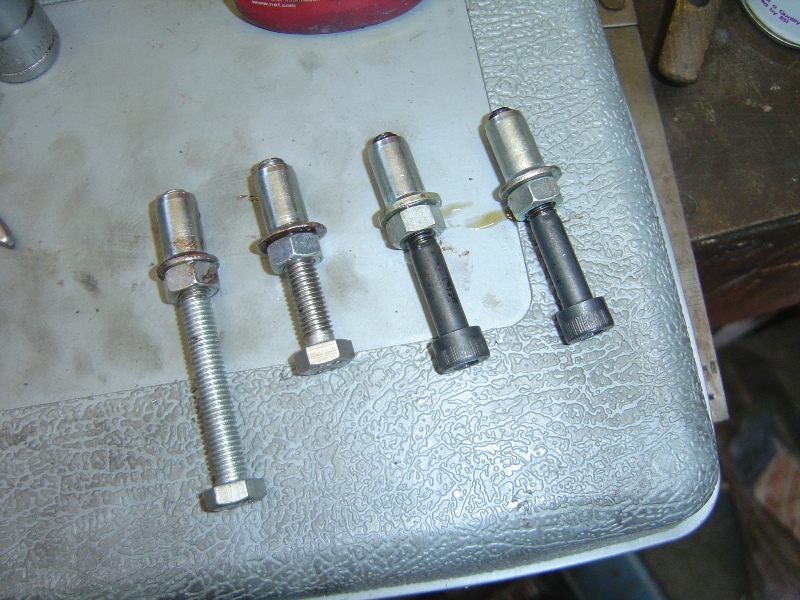 All fitted and in place, hopefully this should stop a little bit of front end twist. 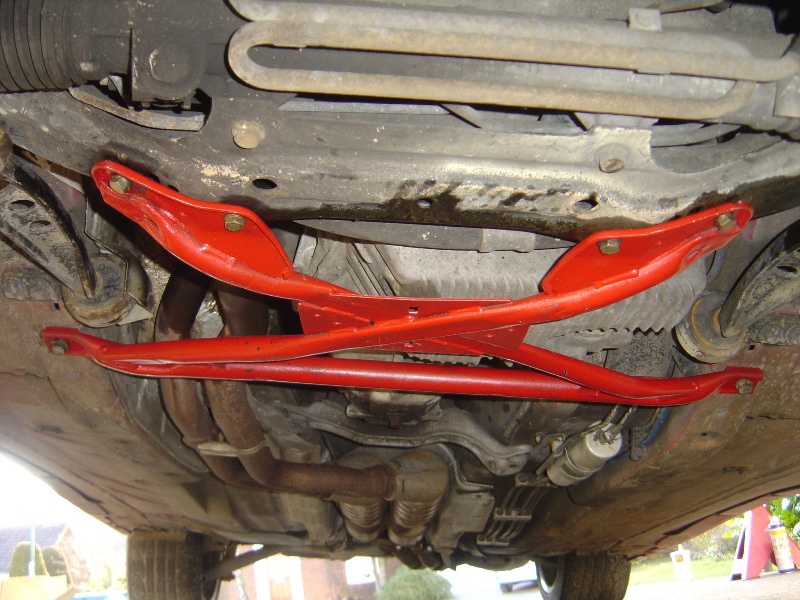 Next to arrive was the coilovers and top mounts, I rebuilt the top mounts making sure that all bolts had a good dose of copper grease to stop any corrosion, and made sure the spherical bearing had a good coating of white lithium grease. Same for the coilovers, these were stripped down and rebuilt with copper grease applied to the threads to stop corrosion, a bit pointless since their stainless steel but it’s just become habit. 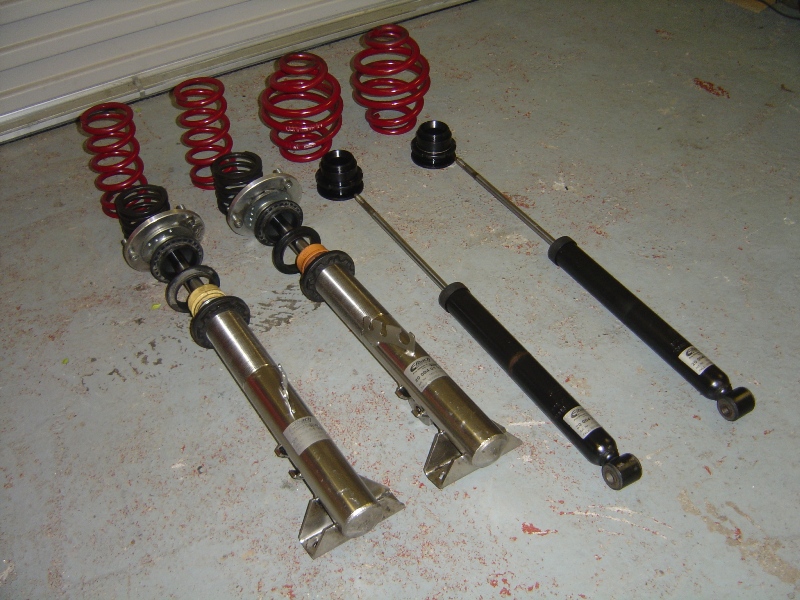 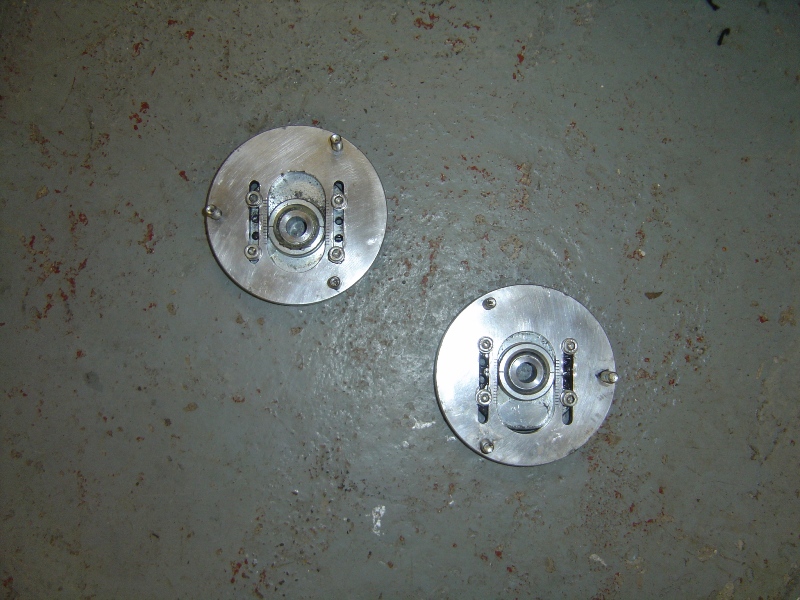 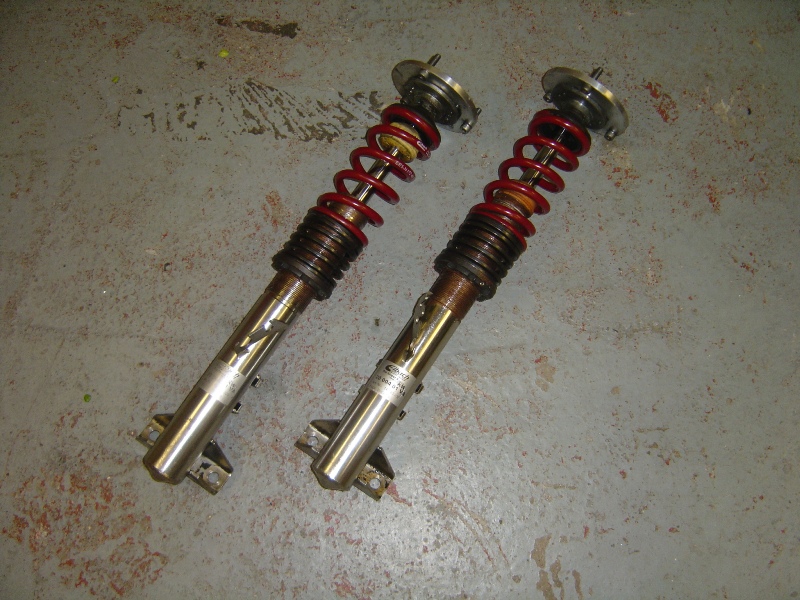 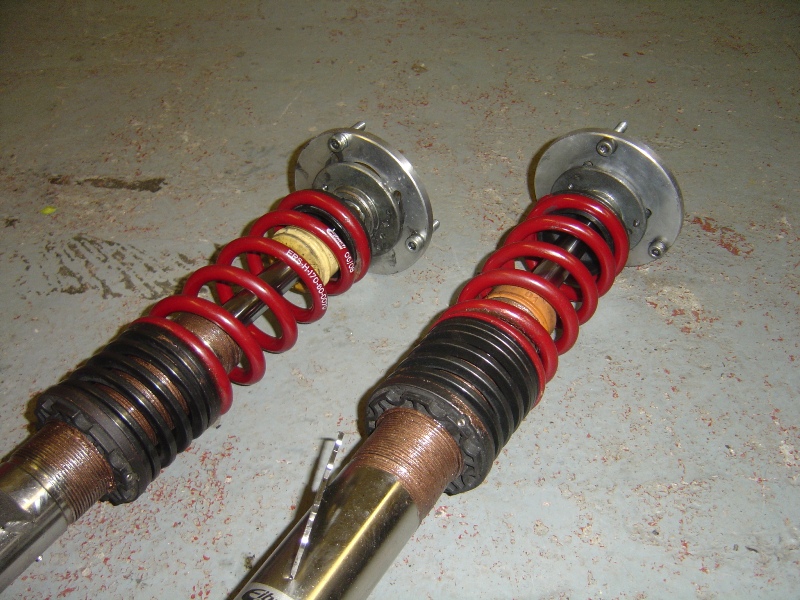 Here’s some more pictures of the parts, braided clutch line, rear top mounts, replacement bolts, polyurethane bushes and braided brake lines. 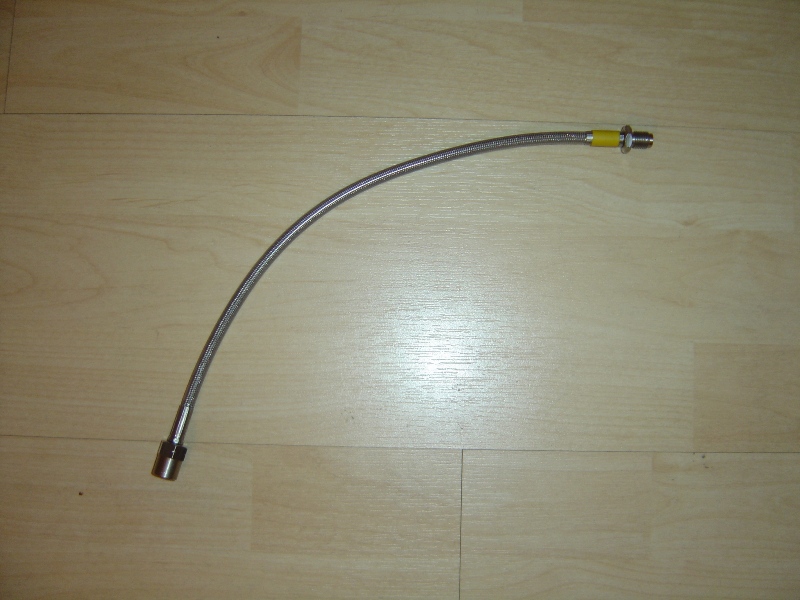 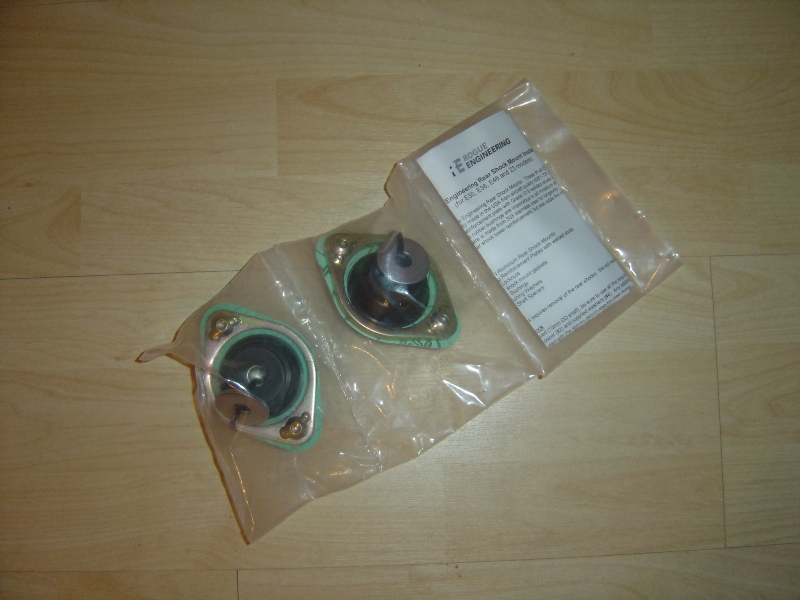 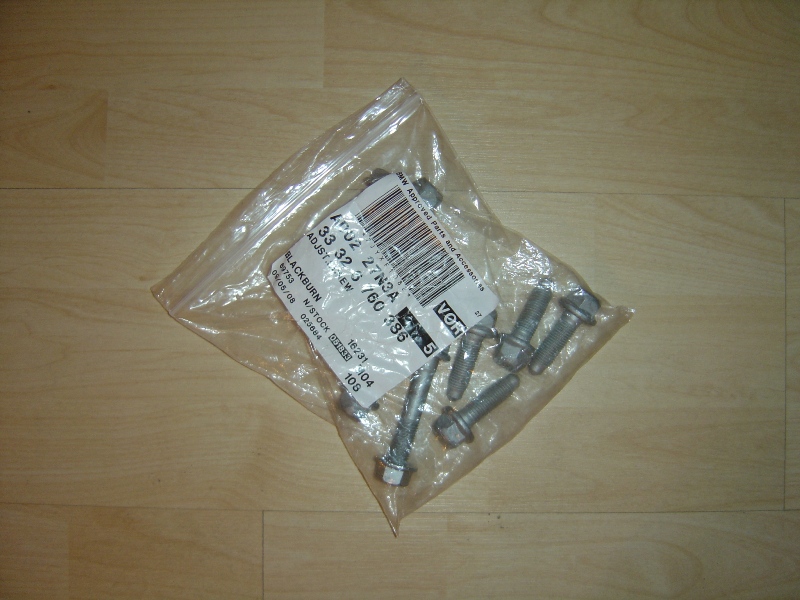   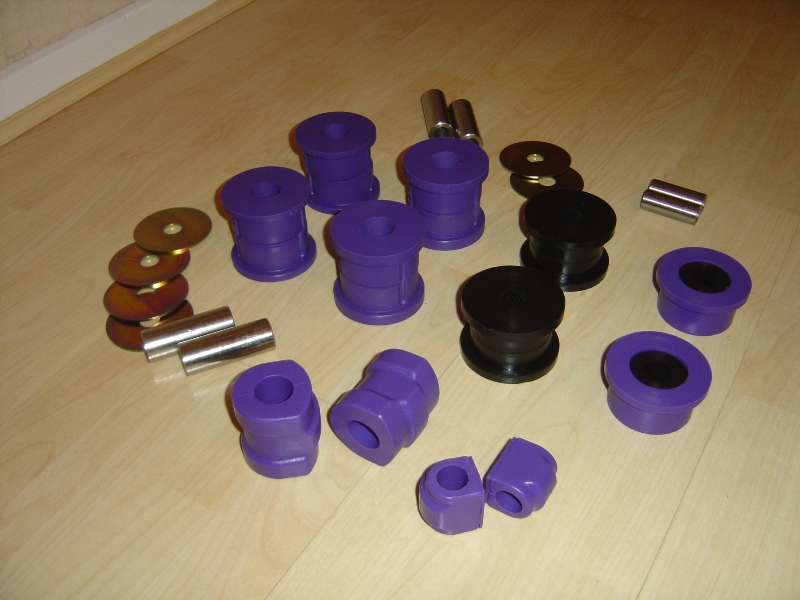  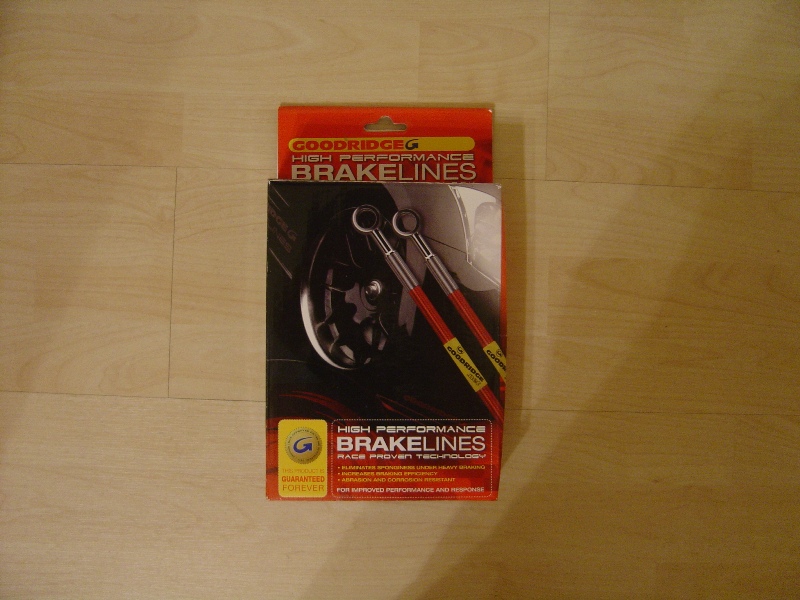 Halleluiah!!!!!!!!!!!!!!!!!!!!!!!!!!!!!!!!!!!!!!!! !!!!!!!!!! Finally all the long awaited M3 Evolution parts arrived, work got pretty much straight under way with these bits, I even called in a few favours at work and used the press in the fabrication shop to speed up the removal of the old trailing arm, wishbone and diff carrier bushes. Time was not on my side, I had a few hours in between shifts to get everything ready and painted for my weekend off (19th March) but I managed it, just! 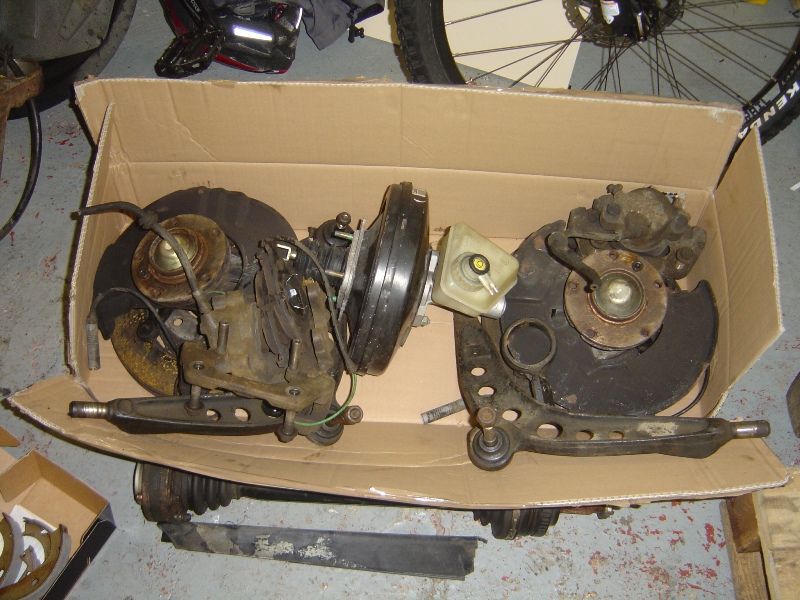 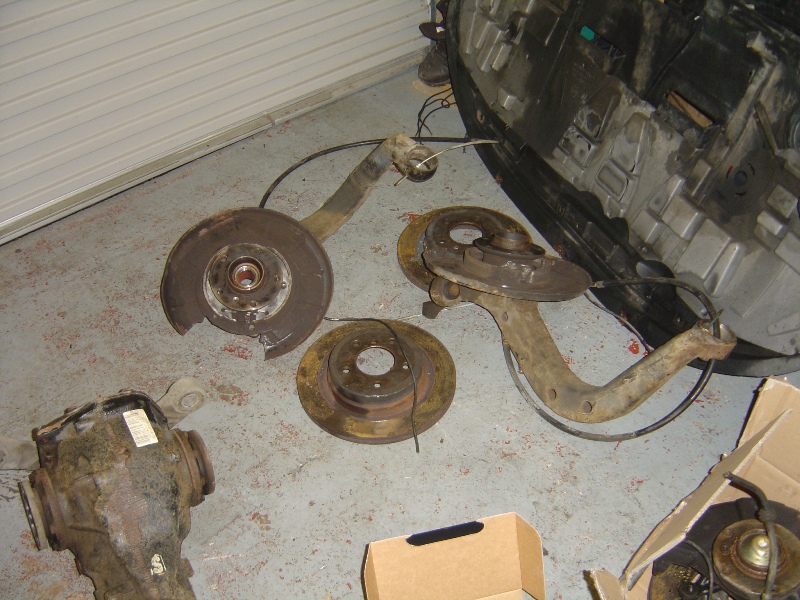 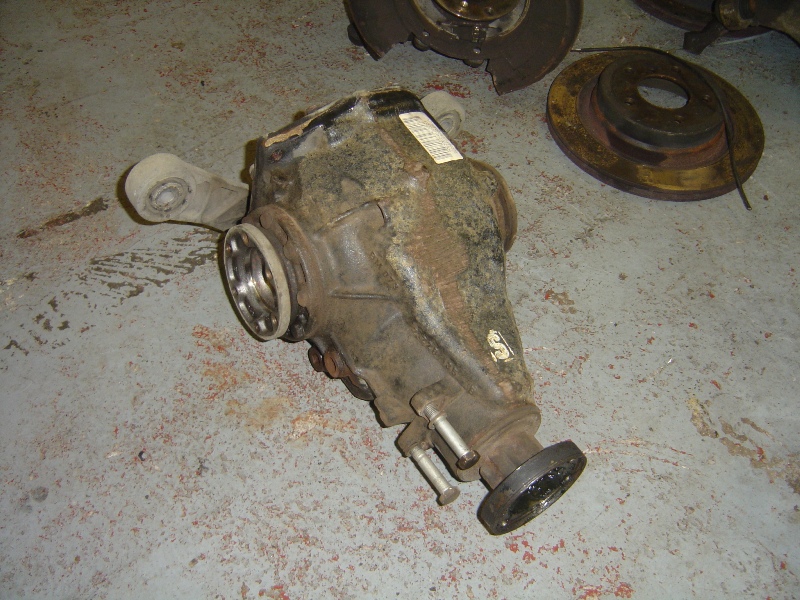 Callipers after been given a lick of paint and a good once over, what can I say I’m a tart and really like red brakes and think it will go well with the red and black theme that will eventually end up been carried out on the car.  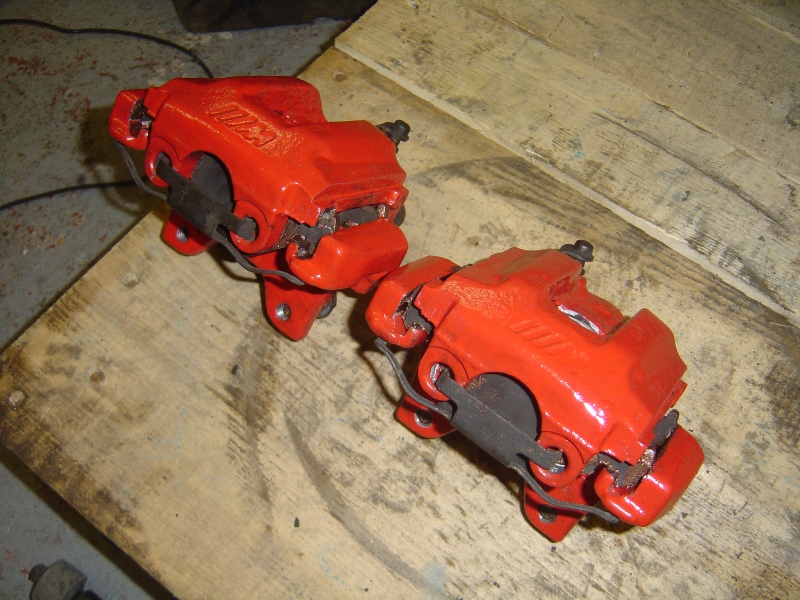 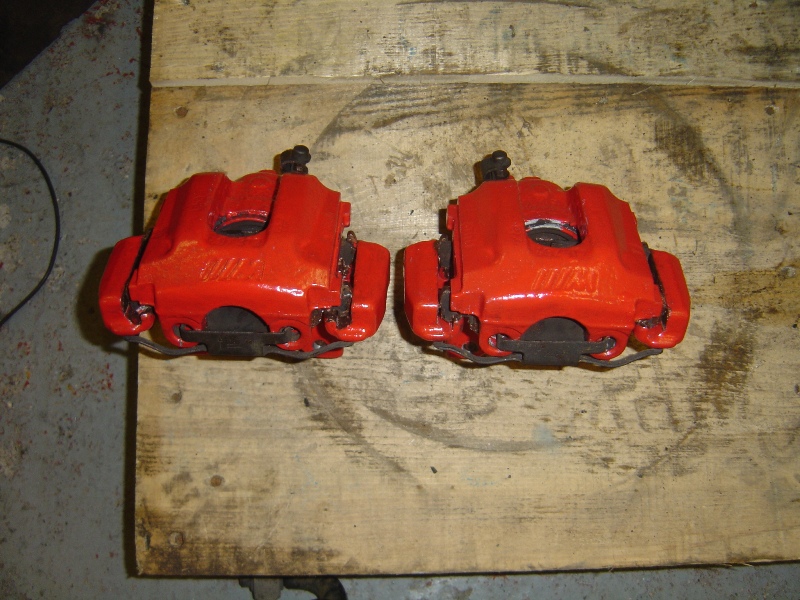 Now came the painting of all the rear axle parts, I opted for boring black because I like things also looking OEM and not screaming look at me. 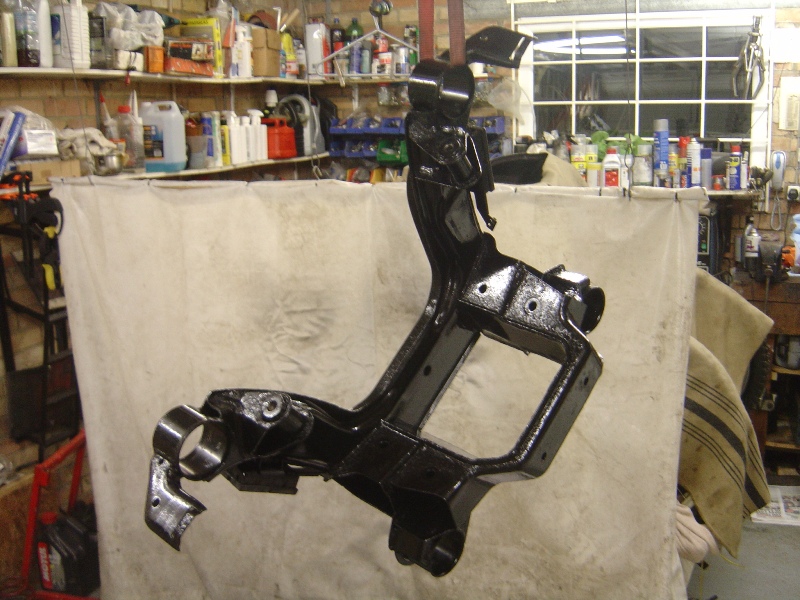 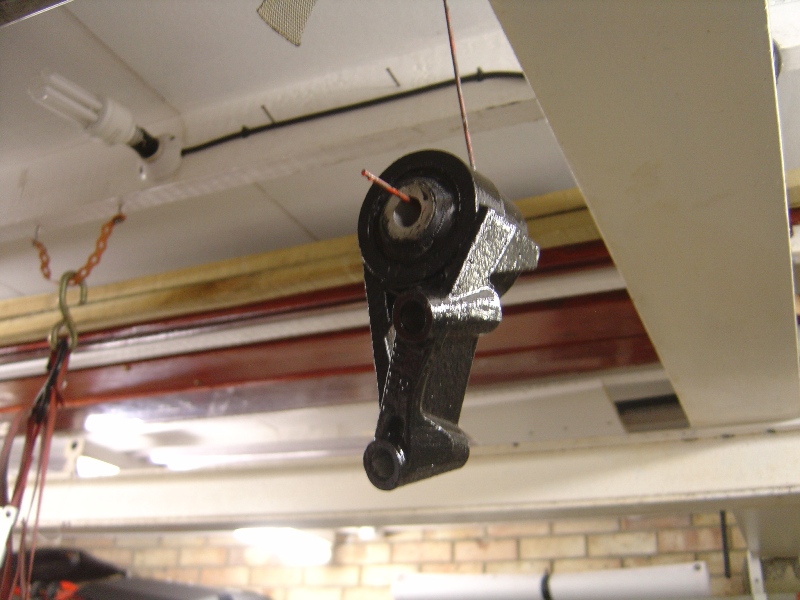 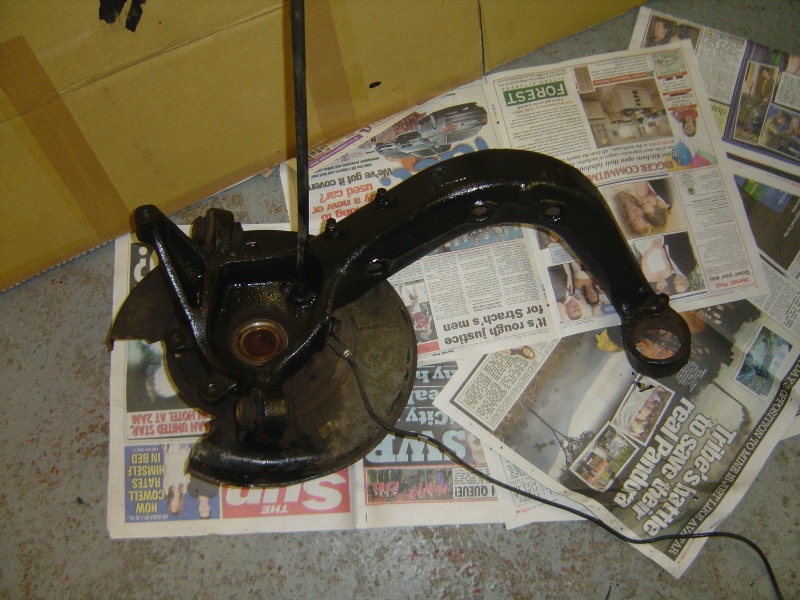 Now came for re-assembly of part of the rear axle ready for bolting straight up to the car, I decided to leave the trailing arms off for the time being to reduce the overall weight of the axel when moving it around and of course offering it up to the car. 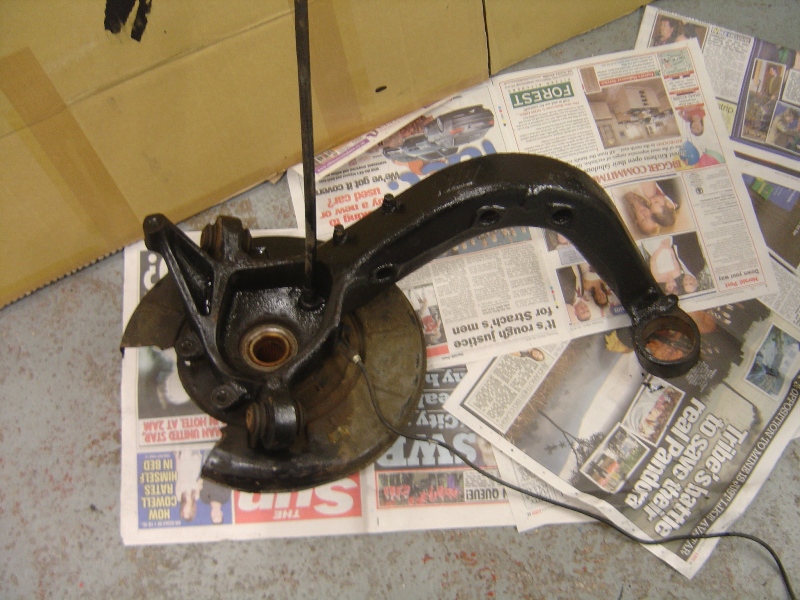 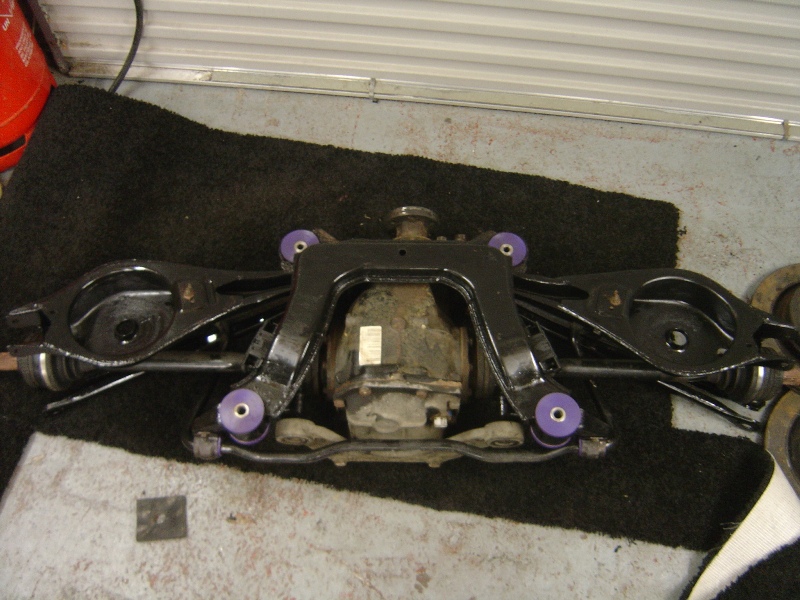 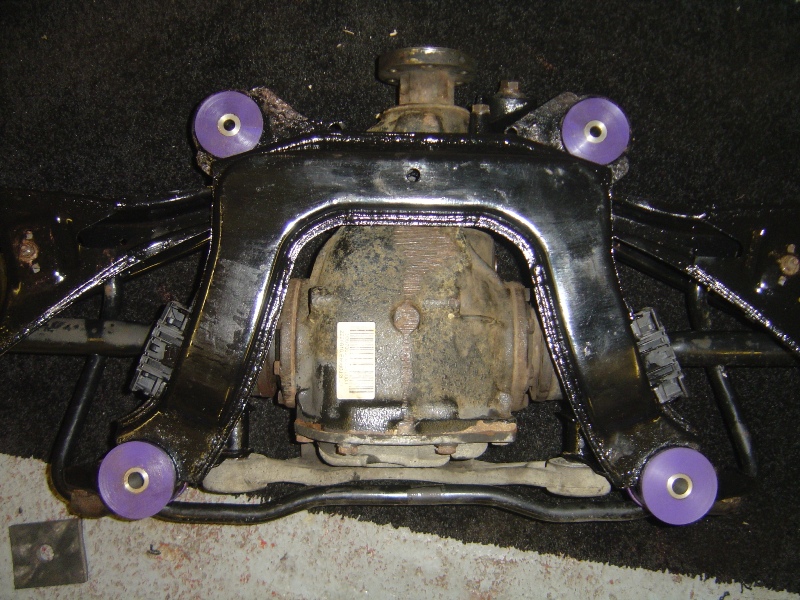 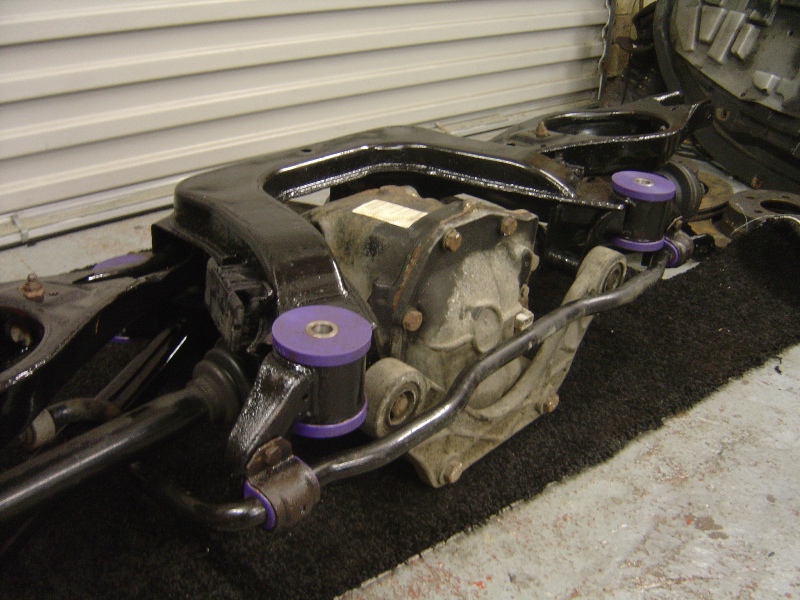 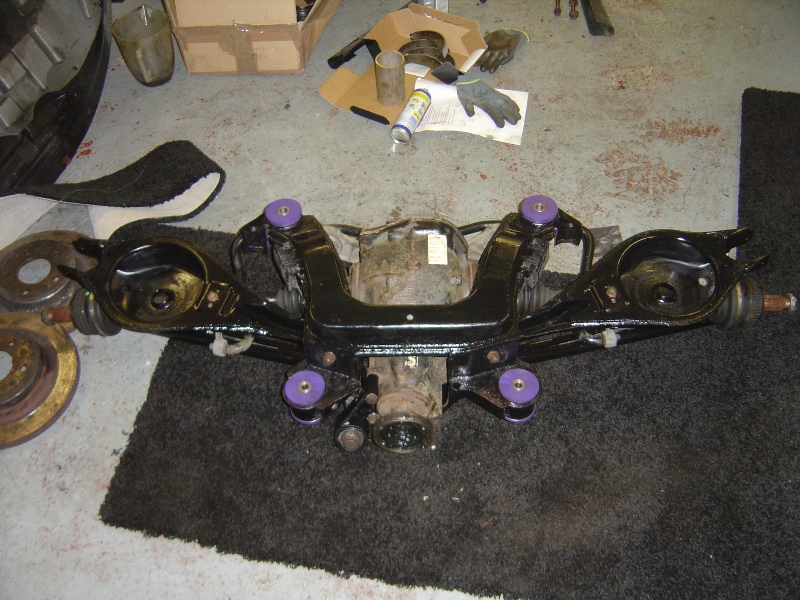 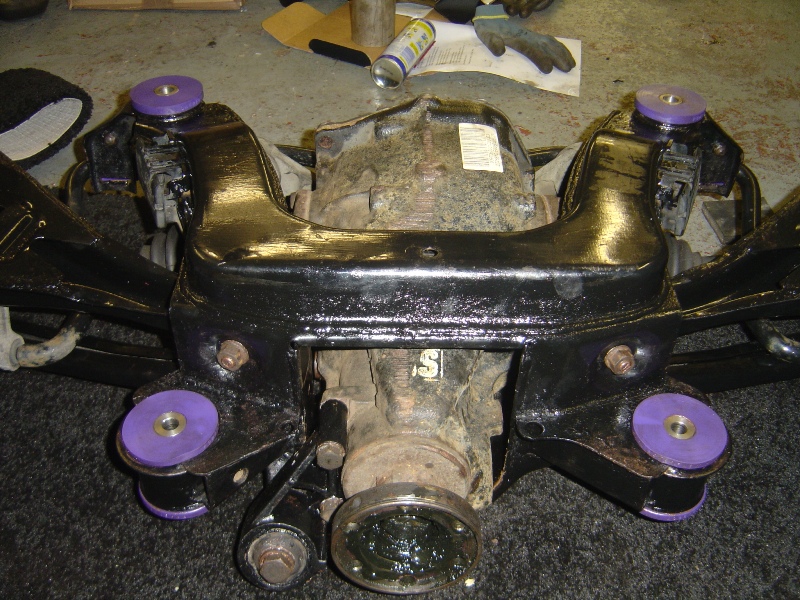 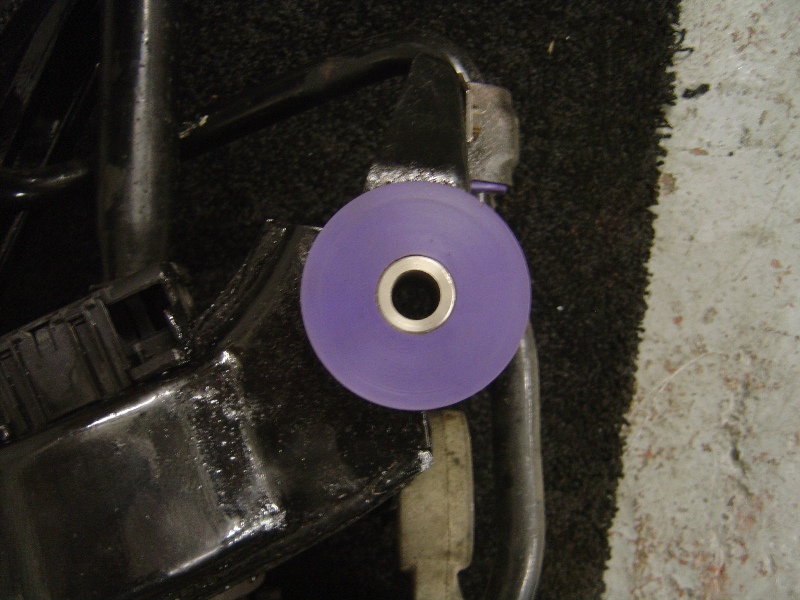 I’d just scraped the deadline, finished work at 22:00 on the 18th and went straight home to rebuild the axel ready for my 3 days off where I had planned to at the very least get the rear axle, gear shifter bushes and rear brakes done. Everything was now set for an early morning start, time for bed! Well I say everything, there was only one gamble, I still had not received the M3 3.0 prop shaft... so on Wednesday night I spoke to Russ @ M3 Spares and asked if he had any, he did and promised to send it out on Thursday via 24 hour, it was a gamble as if it didn’t arrived I would be without transport on Monday when I was due back at work. Morning loomed and the weather was on my side, I got the car right up in the air and secured on 4 large axel stands. First to come off was the rear wheels, then disconnect the brake lines, the abs sensors and the rear pad wear sensor. Then onto removing the X-brace to gain access to the exhaust, my previous fitting off new bolts speeded up this process and all was off within an hour or two.  Next up was to drop the rear axle, again planning in advance and removing and copper greasing all the bolts ensured everything came free without any drama, I’d also previously WD40’d the brake lines to help when it came to splitting them too. 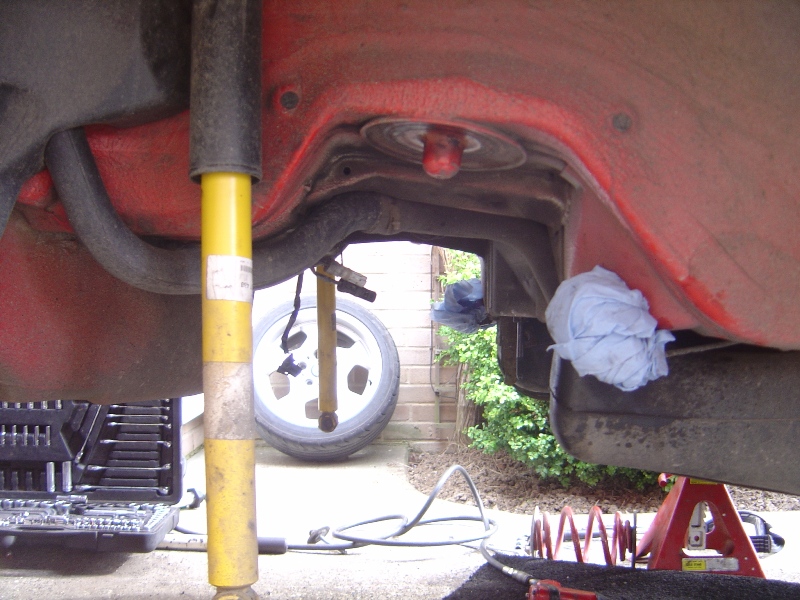 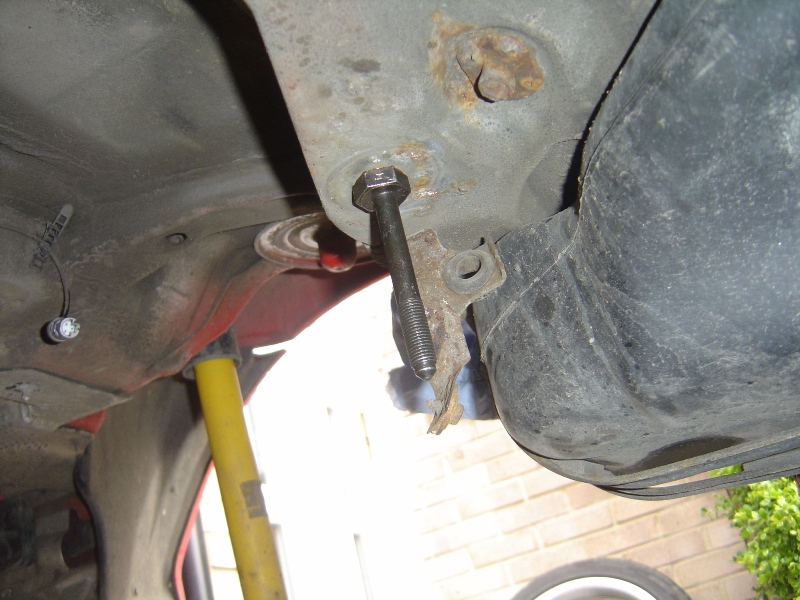 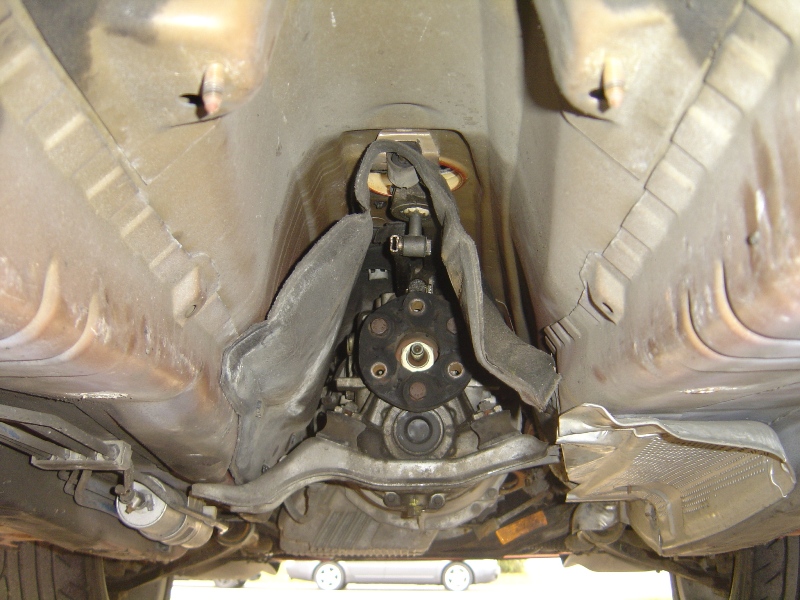 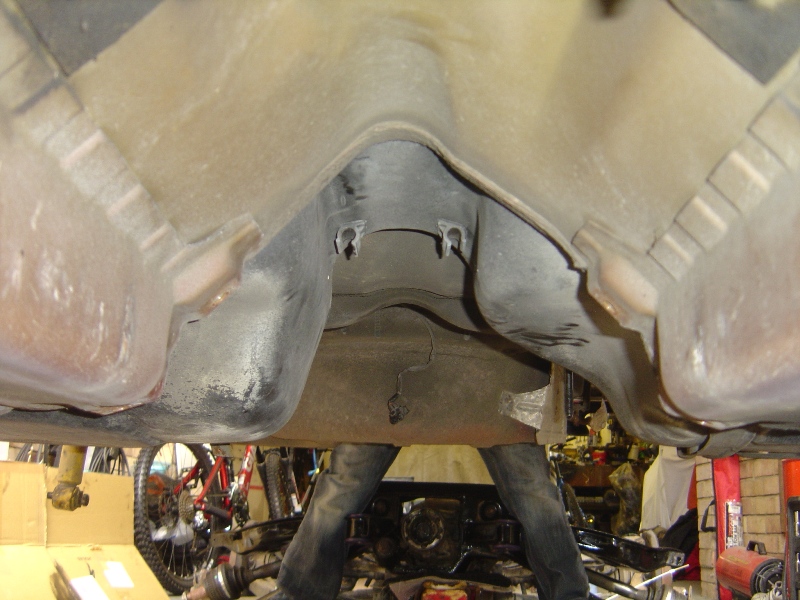 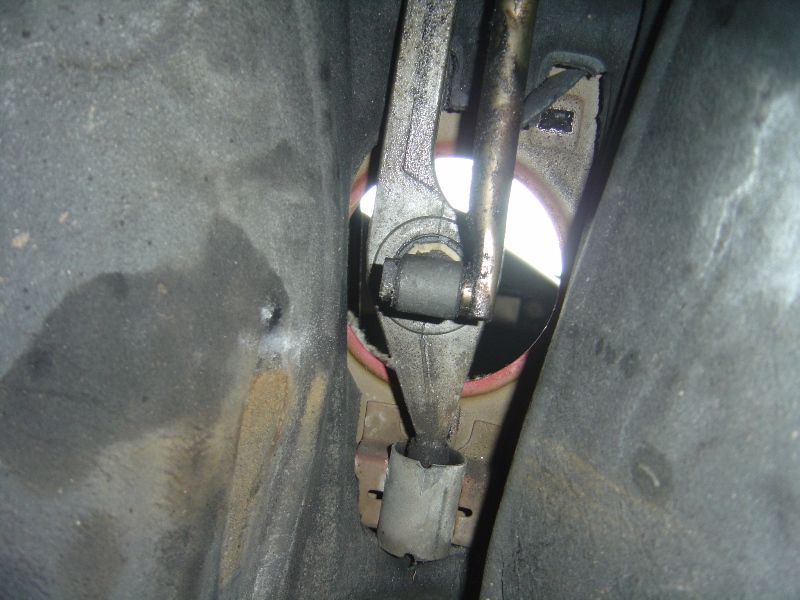 We were only a few hours into it and already we were ready to bolt up the new axel, from here the picture get a little vague as we just concentrated on the job in hand, and guess what... the prop shaft arrived!!! *PHEW* Once the rear axle and trailing arms were on, along with all the rear callipers, drive shafts and hand brake cables in situ I decided to crack on and fit the Z3M shift and replace all old bushes with brand new ones to remove any slop from the shift, after all the car has done 167,000 miles remember. This was a very fiddly job, especially in the dark, laid on my back working on a gearbox that was still in position. The top clip which needed removing was a case of working blind simply by feel, but after 20 minutes I had got it to release. The whole process probably took an hour or two but there was no rushing about it was nearly mid-night by this point. It was worth doing though as even without driving the car the shifting was much tighter and the Z3M shifter had made the shift a lot more precise.   Saturday morning and it was pissing down, but I carried on with the help of some friends we got the prop-shaft fitted, re-fitted the heat shields and exhaust as well as fit the Eibach Pro-Street rear dampers and springs, along with the Rogue Engineering top mounts. All was going well, but then we hit a snag when bleeding the brakes one of the unions was not sealing correctly, it looked like the threads were shot and at this point I decided to call it a day as I was soaked through and loosing my temper. Onto Sunday, I had access to a brake pipe flaring tool and got hold of some copper pipe and unions, but things did not look good. To run a line correctly the prop shaft and exhaust would have to be re-removed and also the fuel tank dropped. Fortunately luck was on my side, on further inspection only a tiny bit of the lower thread was damaged and this was stopping it making a perfect seal, after a little rub over with a thread file all was fine and my blood pressure returned back to normal. We bled the brakes through and proceeded to also fit and bleed the braided clutch line, as well as adjust the handbrake correctly. All was done, after a lot of hard work and the help of a few good friends we had successfully achieved what we had planned. 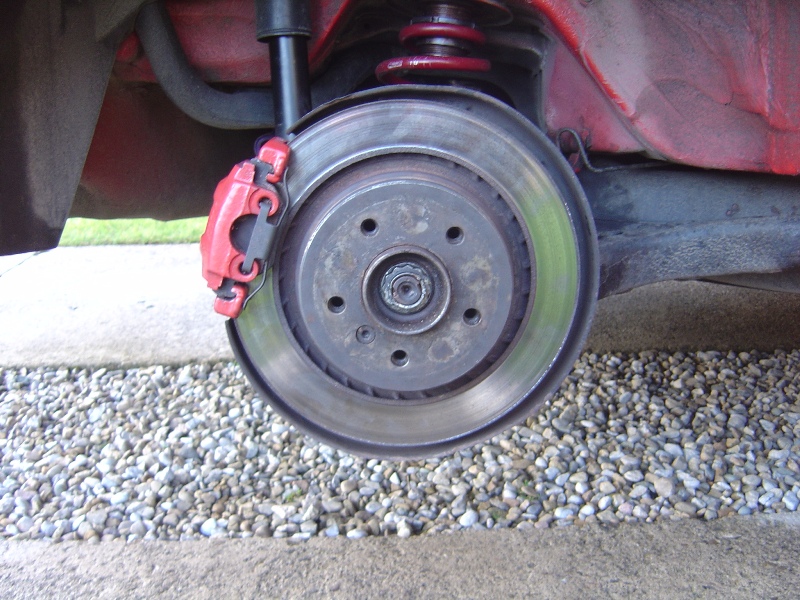 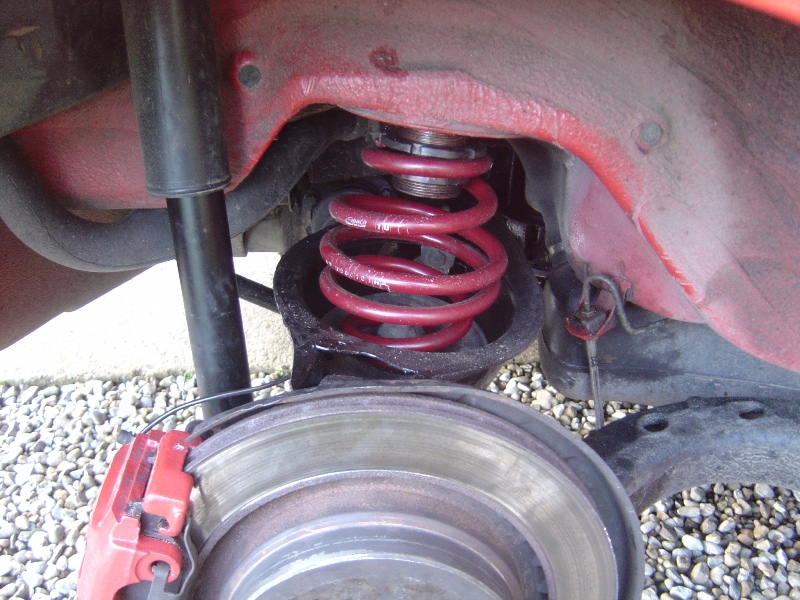 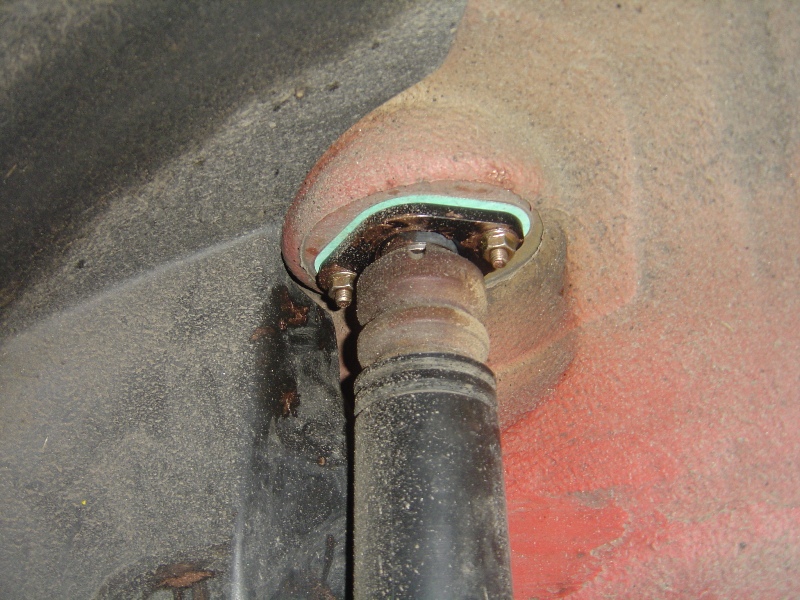  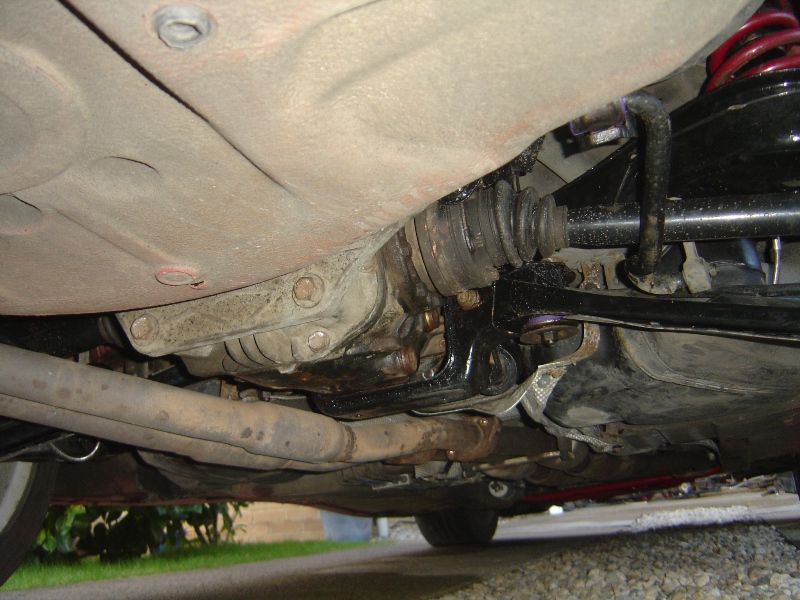  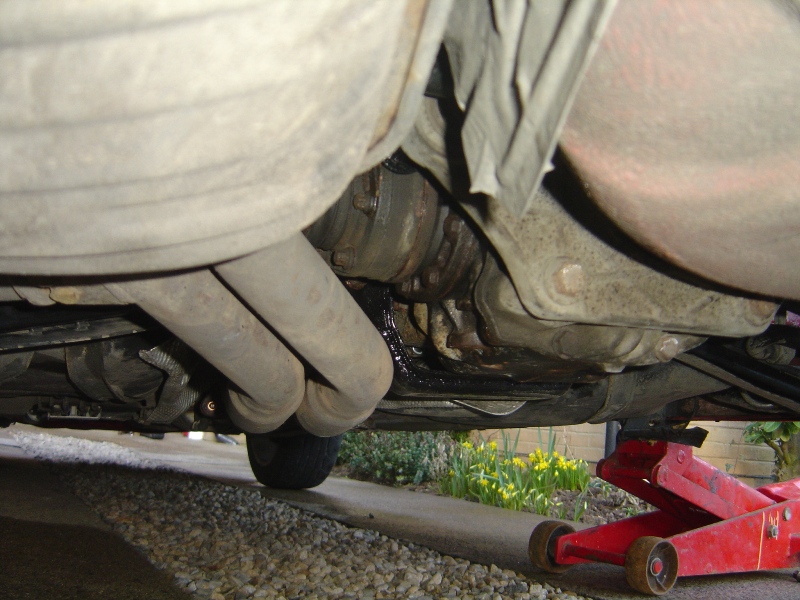 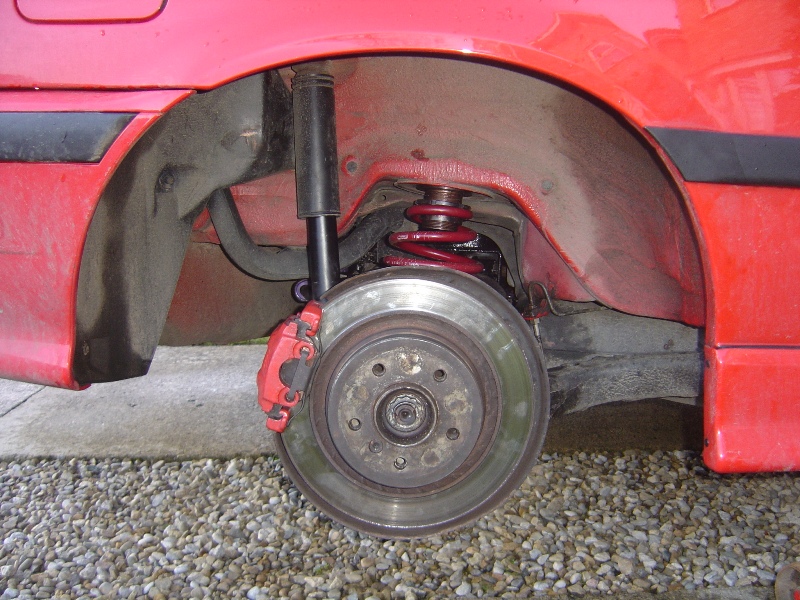 Upon driving the car the back end is so much tighter, the diff really is noticeable and the brake feel is good, soon to be further improved when the fronts are fitted. The shifting is perfect, the car feels like a brand new car, and removing the stupid delay valve and fitting a braided line has done wonders for the feel of the clutch. So far I’m seeing a lot of potential from this car on track, I’m going to be fitting all the front end parts next Monday and Tuesday, and then hopefully I’ll be all set for Germany in a few weeks time. I’ll be posting updates as and when work is carried out, so be sure to check this post again soon!! |

|

|
|
|


 Threaded Mode